Spark dev containers: packaging code for testability

In this fourth post in my series on improving feedback loops for Spark development I'll show how to take the exact code I tested locally, and run it in a hosted Spark environment in the cloud.
Remember, the goal was to improve two feedback loops. First, I wanted to improve the inner dev loop by reducing the time between having an idea, and finding out whether it works. Second, I wanted a way to run repeatable automated tests against code that relies on Spark to implement some or all of its logic.
To enable this, I set up a dev container configuration for running Spark locally. Next, I created tests that could validate the behaviour of Spark-based code by running it against the local Spark service in the dev container.
But this would all be for nothing if I couldn't use the code in production. At some point I'm going to want to execute the code I wrote on a real Spark cluster. The way to achieve this is to build a package containing the locally-tested code, and deploy that package into a hosted Spark environment.
Creating a package
Python packages are distributed as "wheel" files—files with a .whl extension. If you want to package your project into a wheel, you'll need a pyproject.toml file at the root of your workspace:
[build-system]
requires = ["hatchling"]
build-backend = "hatchling.build"

[project]
name = "test_packaging"
version = "0.0.1"

[tool.hatch.build.targets.wheel]
packages = ["src/test_packaging"]
In this case I'm using test_packaging as my target package name. Normally you need to take steps to ensure your package name is globally unique to avoid potential naming collisions. However, I will not be uploading this package to any public package repositories. The only reason I'm building a .whl file at all is because that's the format I need if I want to upload the thing to a private environment in something like Synapse, Databricks, or Fabric. So in this case, my very generic choice of name shouldn't cause any problems. In a real application you'd most likely choose some name that better represents what your application does.
The final line of that file tells the tool where to look for files to include. I only want to package up the application logic code, and not the tests. In the earlier posts in this series, I just put that code at the root of the workspace, but this is a bad idea for a few reasons. First, the packaging tool might end up including things we don't want (e.g., test code) in the package. Secondly, there are various subtle problems around implicit search paths in Python, and the usual recommendation if you're building a package is to follow a convention where code to be packaged lives in a src/<package_name> folder. That's why I've told it to look in src/test_packaging.
That folder doesn't actually exist yet, so I'll need to create a src folder with a test_packaging subfolder, and then move heights.py in there.
When I move the code into this new folder, VS Code's Python support notices that I'm effectively changing the module name, and it offers to perform a refactoring for me. Specifically, it suggests changing my height_steps.py so that this line:
from heights import get_average_height, get_max_height
becomes this:
from test_packaging.heights import get_average_height, get_max_height
I'll accept its offer to do this. (If you're following along and for any reason VS doesn't offer to make that change, you'd need to modify your height_steps.py manually.)
Although this is enough to keep the Python language services in VS Code happy, if I try to run the tests, the Behave test runner now fails because the step files can no longer find the methods they are trying to test, despite the fact that I just changed the import to account for the change.
It turns out that although the VS Code Python tooling understands the src/<package_name> convention, Behave won't automatically look for anything in the src folder. The rationale for this is that if you're producing a package, your tests should be required to import that package so that they consume the code under test in the same way anyone else would. This is meant to make it less likely that tests rely on the specific folder structure on your machine.
I don't actually have to fully build the package, publish it, and then import it. This command will import the package in situ:
pip install --editable .
After this, the tests will work again. The effect is that the Python interpreter (and thus Behave) will now look in the package folder I specified in the pyproject.toml. (So this is a special kind of import that doesn't actually copy any files anywhere. It just gets Python to look in the place the files happen to live. If I make changes to the code under test, I don't need to repeat this installation step, because there aren't any copies that need to be updated.)
It's important to keep the tests working, but once they all pass, I do actually want to build the package for real. I need to produce a .whl file so that I can load it into a hosted Spark environment. I first need to install the package building machinery:
pip install --upgrade build
And now I can build the package:
python -m build
This creates a dist folder if one does not already exist, and it then puts a couple of files in there:
vscode ➜ /workspaces/LocalSparkTest $ ls -la dist
total 8
drwxr-xr-x 1 vscode vscode 4096 Dec  5 12:03 .
drwxrwxrwx 1 root   root   4096 Dec  5 13:39 ..
-rw-r--r-- 1 vscode vscode 1089 Dec  5 14:57 test_packaging-0.0.1-py2.py3-none-any.whl
-rw-r--r-- 1 vscode vscode 1570 Dec  5 14:57 test_packaging-0.0.1.tar.gz
The file with the .whl extension is the one we need. So now let's see how to get that into a hosted Spark environment in the cloud.
Microsoft Fabric configuration
I'm going to show the steps for uploading the tested application code to Microsoft Fabric. And although the exact steps would be different, the same basic approach here applies for other systems such as Databricks and Azure Synapse.
When you go to the Microsoft Fabric home page at https://app.fabric.microsoft.com/, it offers various 'experiences'. I want to be able to run my code from a notebook, so I select the Data Science experience:

(Notebooks are also available in the Data Engineering experience.) Once that opens, the left hand side shows a column of buttons, including a Create button:

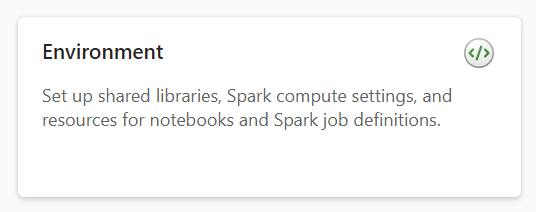
If we want our own Python wheel files to be available to notebooks, Fabric requires us to create an environment:
When you click this button, it asks you for a name for the new environment. I called mine TestPackages. (Since these environments are at the scope of your whole Fabric account, you'd typically choose a name specific to your application.) When the page for the newly-created environment appears, I see some buttons for managing libraries near the top left:
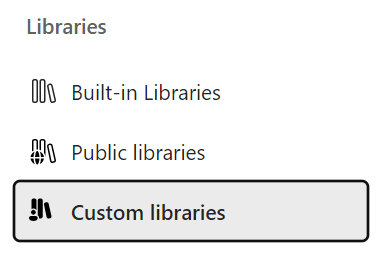
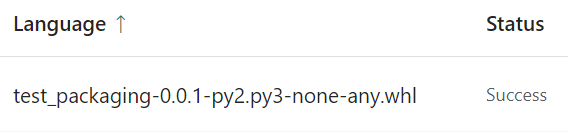
I click the Custom Libraries button. The main area of the page now shows a list of the custom libraries available in this environment. Since this is a brand new environment, it's empty, but there's an Upload button. I click that, upload the .whl file I created earlier, and then click Publish. Fabric then has a bit of a think. In fact quite a lot of a think—this stage can take around 15 minutes. Eventually, it shows my wheel file in the list:
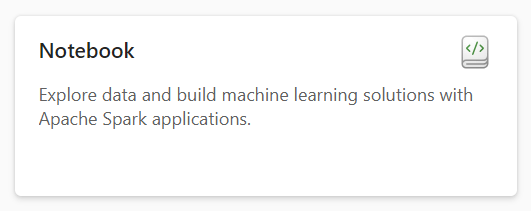
Now that Fabric has my package, I can try it. I click the Create button at the top left again, but this time I choose Notebook.
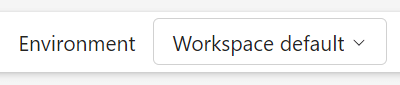
Once the notebook appears, its toolbar includes a dropdown that lets us choose the environment to use. Initially, this is set to Workspace default:
Clicking this shows the available environments. I select the TestPackages environment I created earlier. Now I can check that my application code is available by importing it. I write this code in the first cell in the notebook:
from test_packaging.heights import get_average_height, get_max_height
It takes a couple of minutes to run this first cell because Fabric starts a Spark cluster for me. After that, it reports success:

This shows that Fabric was able to find my code. Now I can try running it.
My code needs some data. When working locally, I just created a CSV. Fabric expects data files to be in a store such as a Lakehouse, and although I probably could arrange to put a CSV file where our notebook can load it, for this example it's slightly easier just to create the dataframe directly from a list in Python:
from pyspark.sql.types import StructType, StructField, StringType, IntegerType, DoubleType

schema = StructType([
    StructField("Id", IntegerType()),
    StructField("Name", StringType()),
    StructField("Hobby", StringType()),
    StructField("HeightInCm", DoubleType())])
df = spark.createDataFrame(
    [
        [1,"Ian","Lindy Hop",183.0],
        [2,"Buzz","Falling with Style",29.0]
    ],
    schema=schema)
That has the same effect as I got from loading the CSV.
And now I can test the code. If I put this in a code cell in my notebook:
get_average_height(df)
it displays 106.0 as expected:

Similarly, if I write this:
get_max_height(df)
It displays 183.0, also the correct result. This shows that the code I developed and tested locally in a devcontainer runs happily in my hosted Spark environment.
Conclusion
We can develop code purely locally, taking advantage of a local Spark instance to be able to iterate rapidly and run tests without needing a connection to a live Spark cluster. But once we're ready, we can package our tested code into a .whl file, upload it to a service that offers hosted Spark clusters such as Microsoft Fabric, and the exact same code that we developed and tested locally is now available for use in a notebook.
At endjin we would typically put orchestration logic in notebooks, and then set up automated execution of these notebooks, typically using dataflow or pipeline features of the hosting service. So we can enjoy the robust execution mechanisms available in these kinds of environments, but also ensure the quality of our code with thorough testing of a kind that's hard to achieve if you are working entirely in notebooks.