Version Control in Databricks


Notebooks provide an interactive and collaborative environment for developing code. As such, in Databricks, notebooks are the main tool for creating workflows. With them, you can develop code using a variety of languages, schedule notebooks to automatically run pipelines, collaborate by sharing notebooks, use real-time co-authoring, and use Git integration for version control.
With Databricks Notebooks, you can apply software engineering best practices, such as using version control to track changes and collaborate on your code. In this post, we will see how to use version control and Git integration with Databricks Notebooks.
Version Control in Databricks Notebooks
By default, Databricks notebooks have version history built in them. When you're working on a notebook, you'll see a tab called ‘Revision history'. Here, you'll find every version of your notebook that has been (automatically) saved.
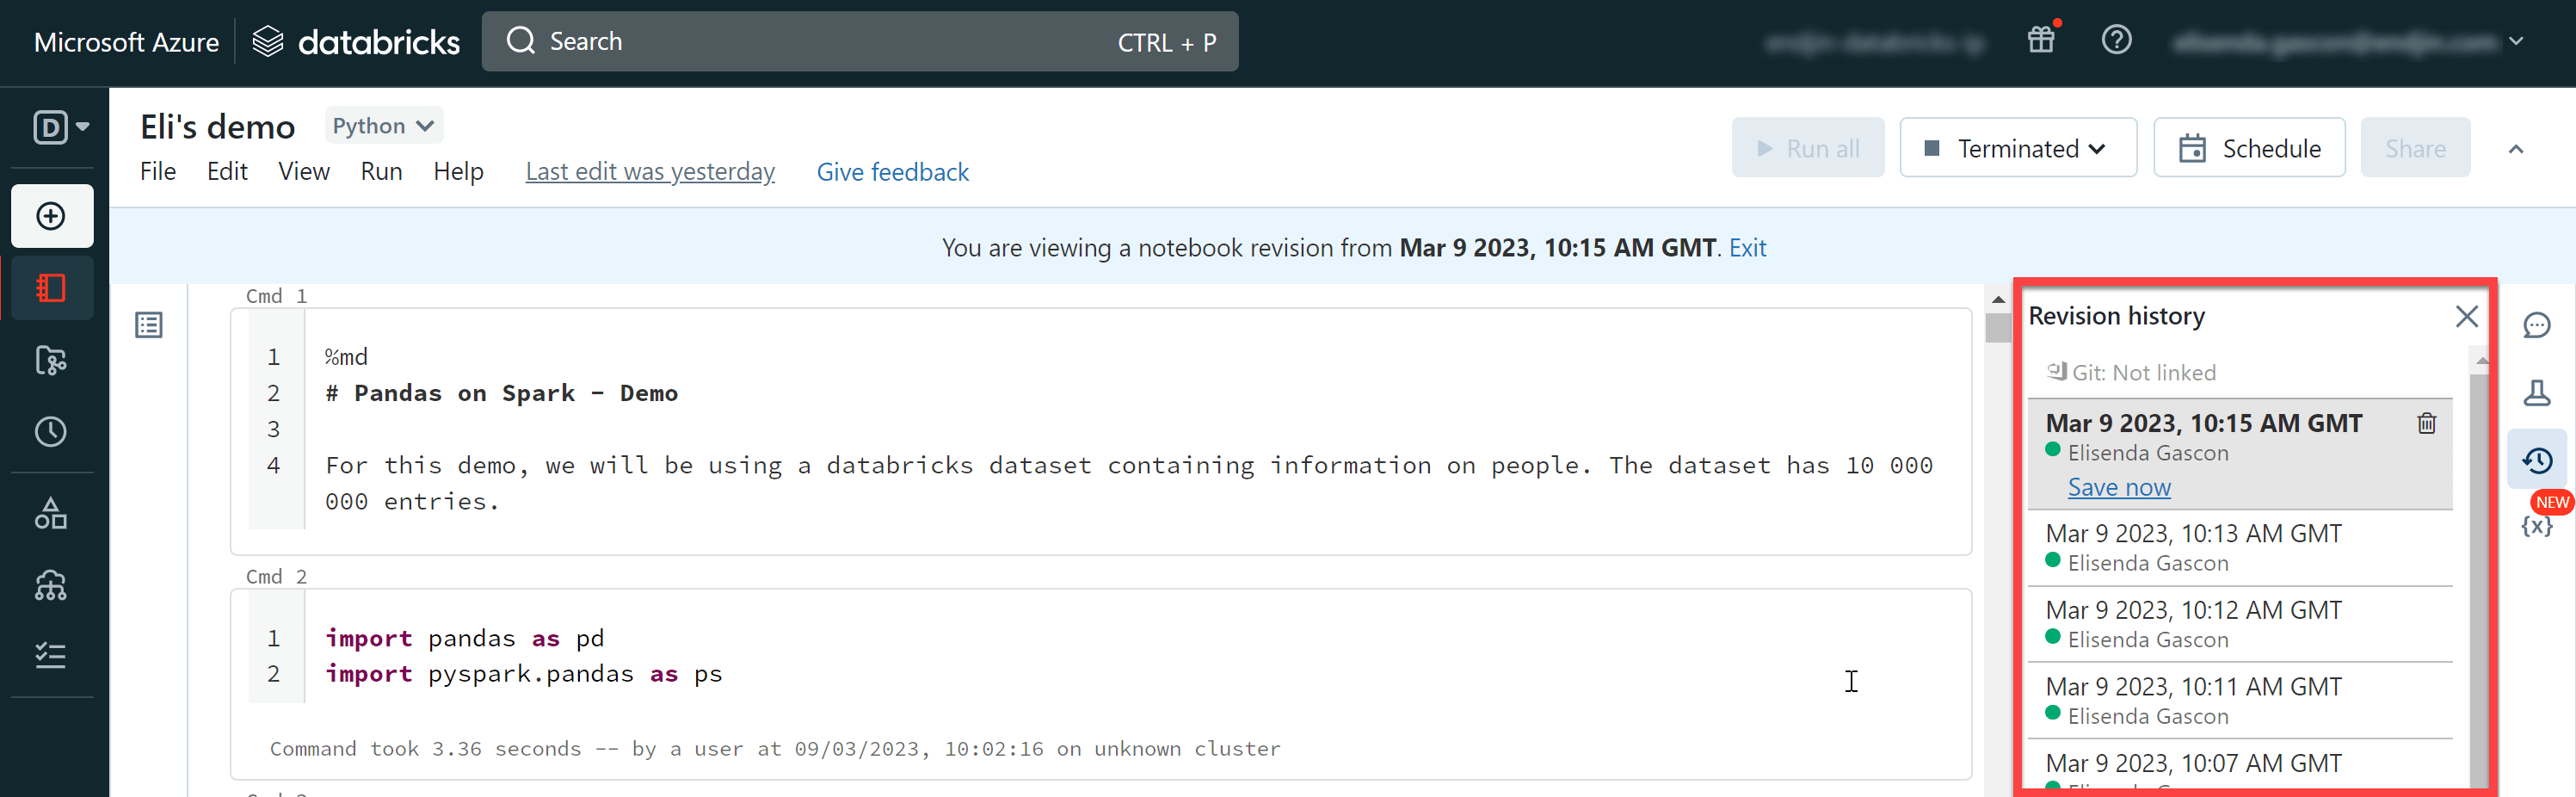
You can restore an earlier notebook by selecting an earlier version and choosing “Restore this revision”:

Databricks has automated version control, which means that version history is always available in your Databricks notebooks without any configuring needed.
This also means that real time co-authoring of notebooks is possible. Two people can collaborate on the same notebook at the same time and see the changes being made by the other person in real time. In the following screenshot, my colleague has added a cell to my notebook. I can see that they're viewing the notebook as well as their cursor.

Note that all users editing the notebook need to have permissions to use the cluster attached to the notebook in order to run any of the cells. Otherwise the above error message will appear.

Git integration in Databricks Notebooks
We've seen that version control is set up by default in Databricks notebooks. However, this versioning lives in the Databricks environment being used. If this environment were to be deleted, all the work and version history would be lost.
Let's see how to use Git with Databricks notebooks to implement version control.
The recommended way to use Git integration with Databricks is to use Databricks repos.
Databricks repos provides Git integration within your Databricks environment, allowing developers to use Git functionality such as creating or cloning repositories, managing branches, reviewing changes, and committing them. This allows developers to apply software engineering best practices when using Databricks notebooks.
Let's see how to set up Databricks repos step by step. In this example, we will be setting up version control using GitHub.
Step 1: Create a repo
Azure Databricks supports the following Git providers:
- GitHub
- Bitbucket Cloud
- GitLab
- Azure DevOps
- AWS CodeCommit
- GitHub AE
In this example, we will be setting up version control using GitHub. For this, we have created a private repository in GitHub called databricks-version-control where we will store our code.

Step 2: Get a Git access token
If your repository is set to public, you can skip this step.
In order to connect to Databricks repos, you will need to create a personal access token (PAT).
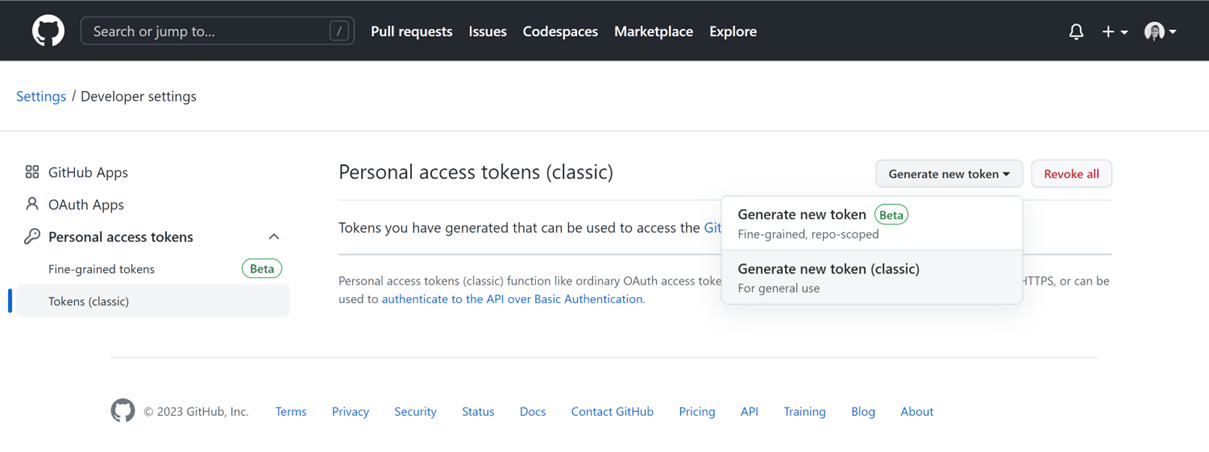
In GitHub, go to Settings > Developer settings > Personal access tokens and click on “Generate new token”.
Provide a description for your token and select the scope to define the access for the personal token:
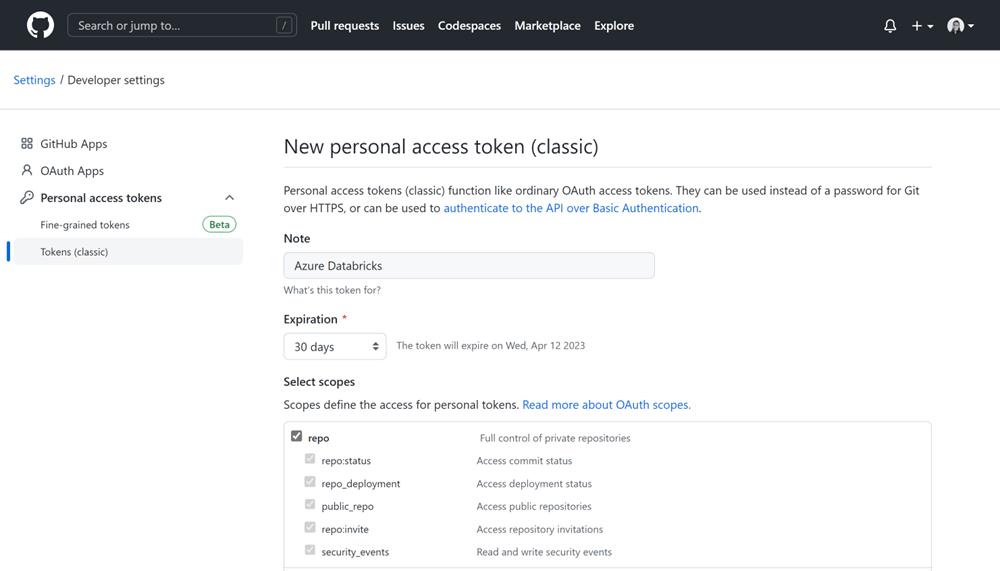
Once you get the token, make sure you copy and save it somewhere, as it will only be displayed at this stage and you will be needing it shortly.
Step 3: Activate Git integration within Databricks
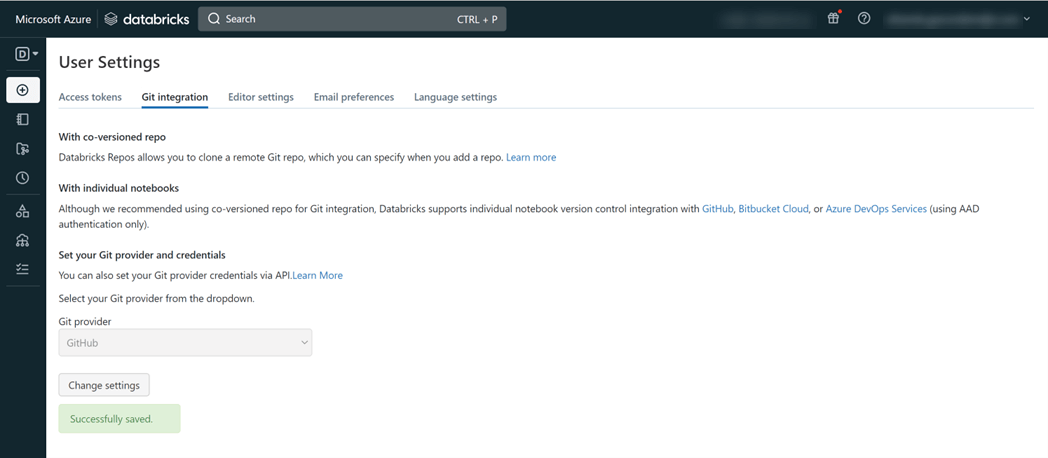
In Databricks, click on your user email on the top right of your screen and select User Settings. Under the Git Integration tab, choose the Git provider you want to use (GitHub in our example), add the username or email and enter the PAT that you've been provided earlier.
Step 4: Add a repo
Now we're ready to link the repo that we created earlier to Databricks Repos.
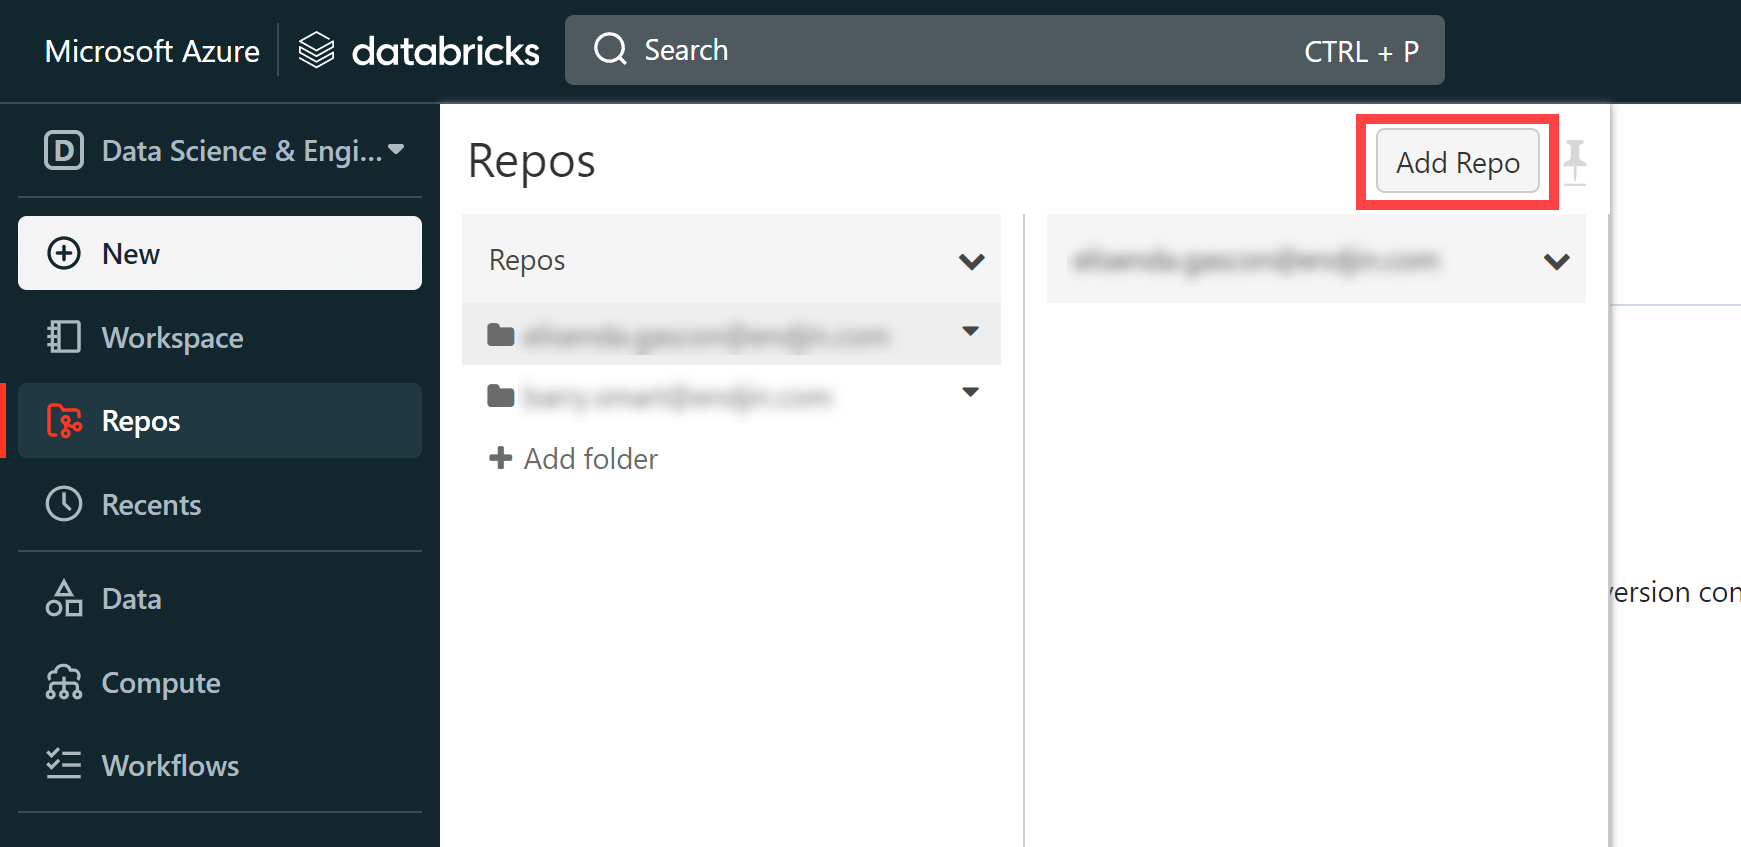
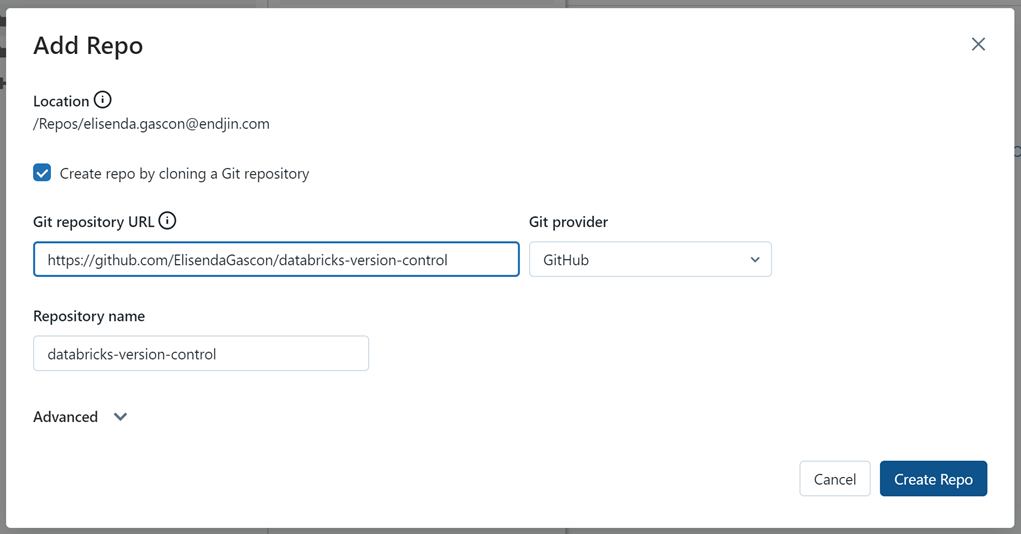
Go into “Repos” and select “Add Repo”.
Enter the URL to your Git repository and create the repo.
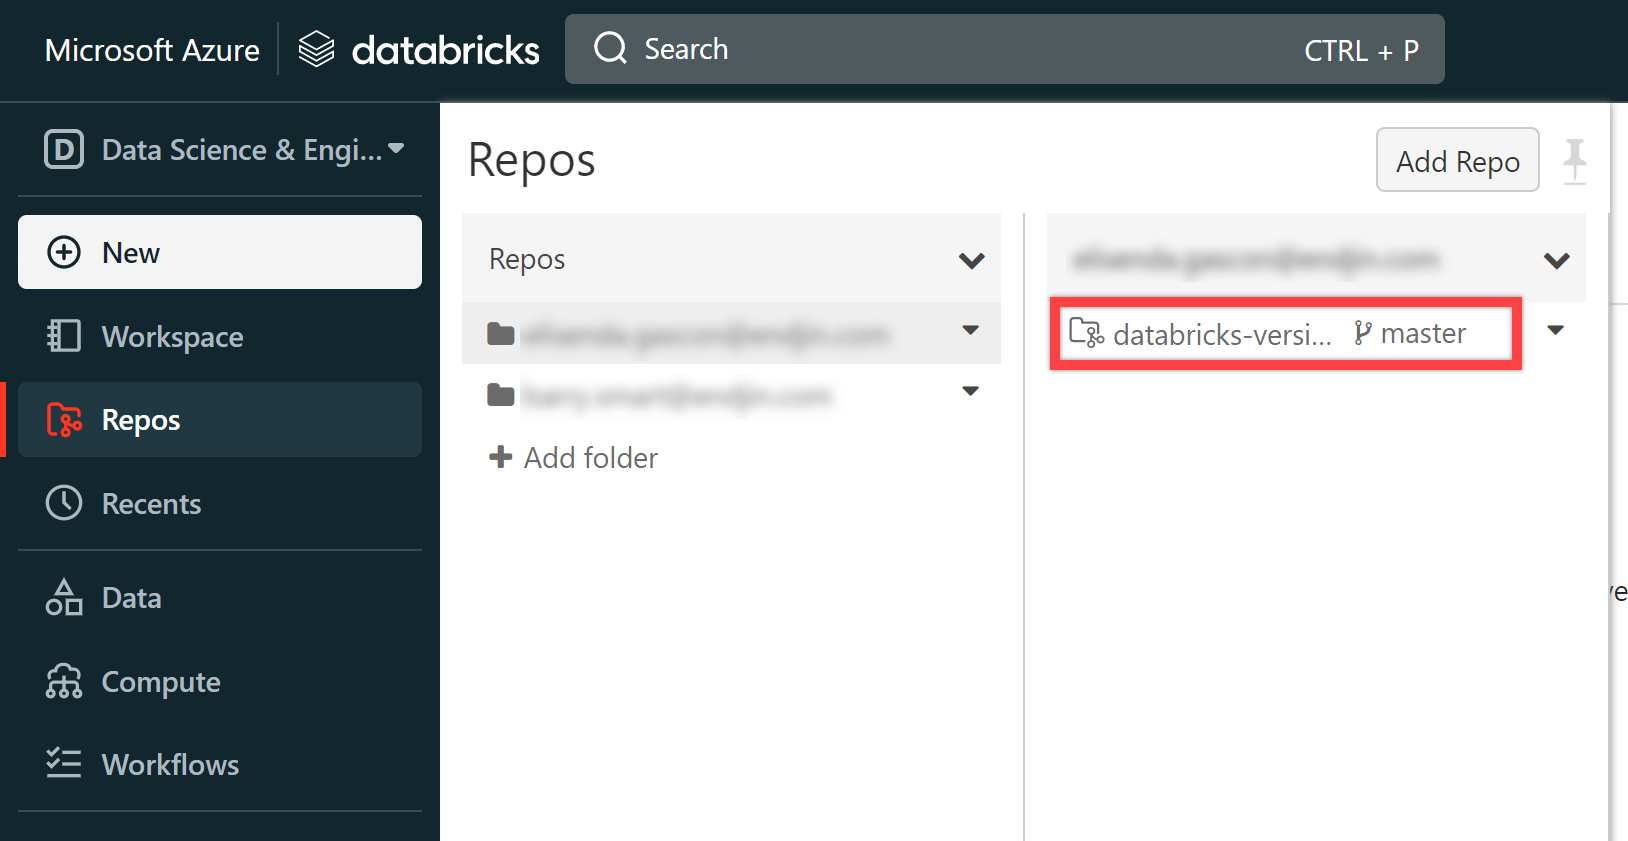
Once your repo has been created, you will see it appear on your menu.
Now that your repo is available in Databricks, you can use it like you would in any other IDE. You can create a branch, update it and commit your changes for review.
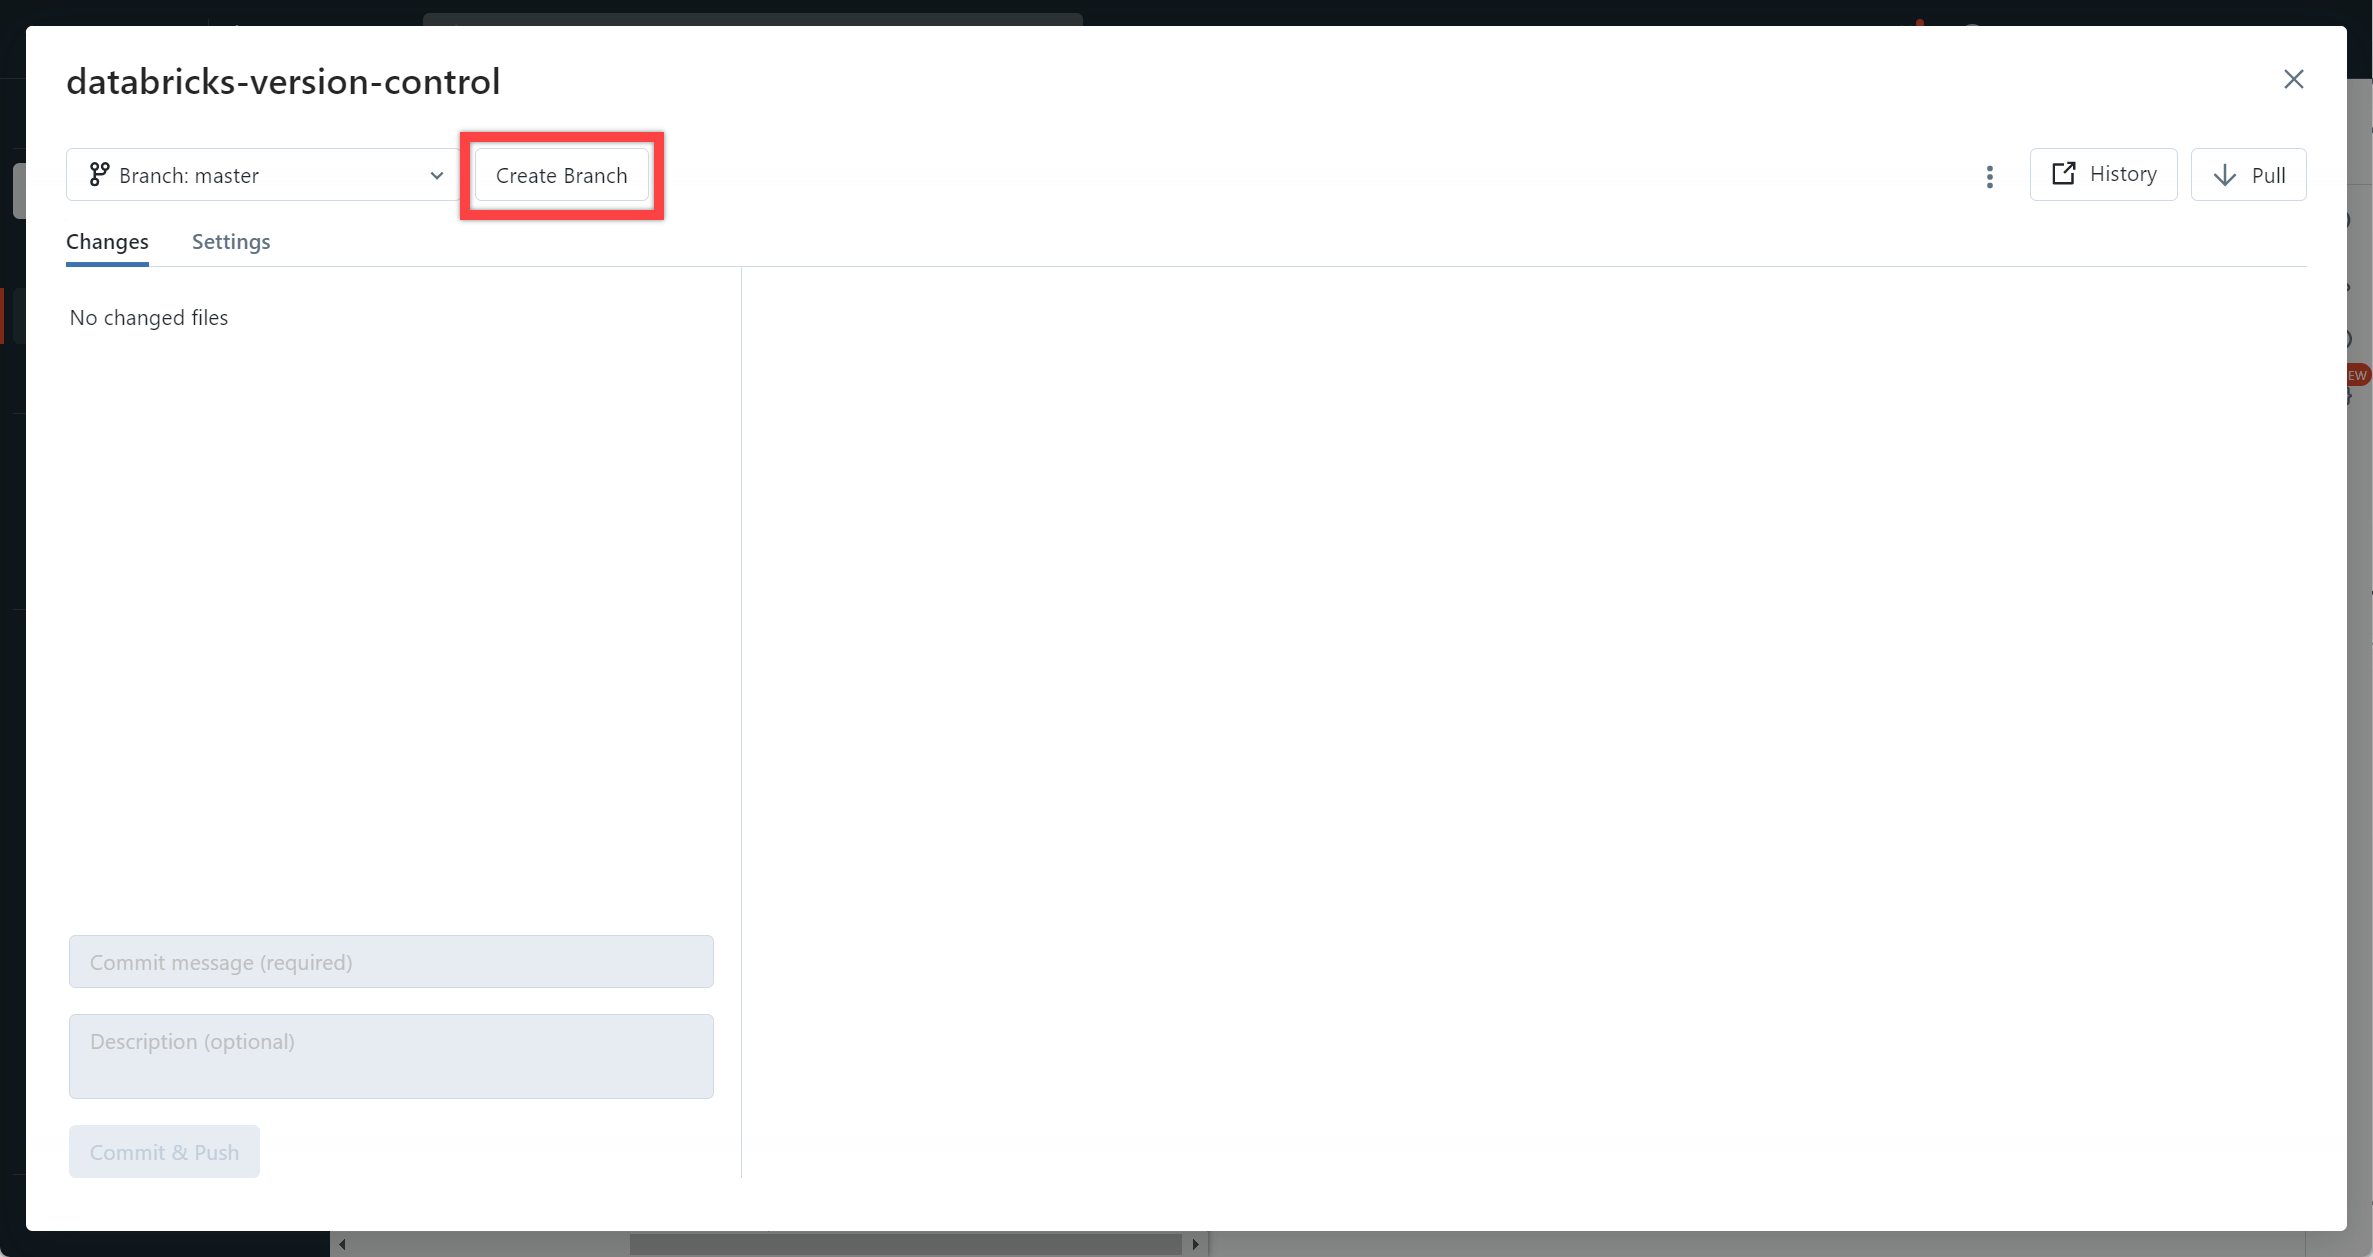
Step 5: Create a branch
To create a branch, select the “master” branch icon showing next to the repository name. A dialog will open. From here you can see if any changes have been made, and create a branch.
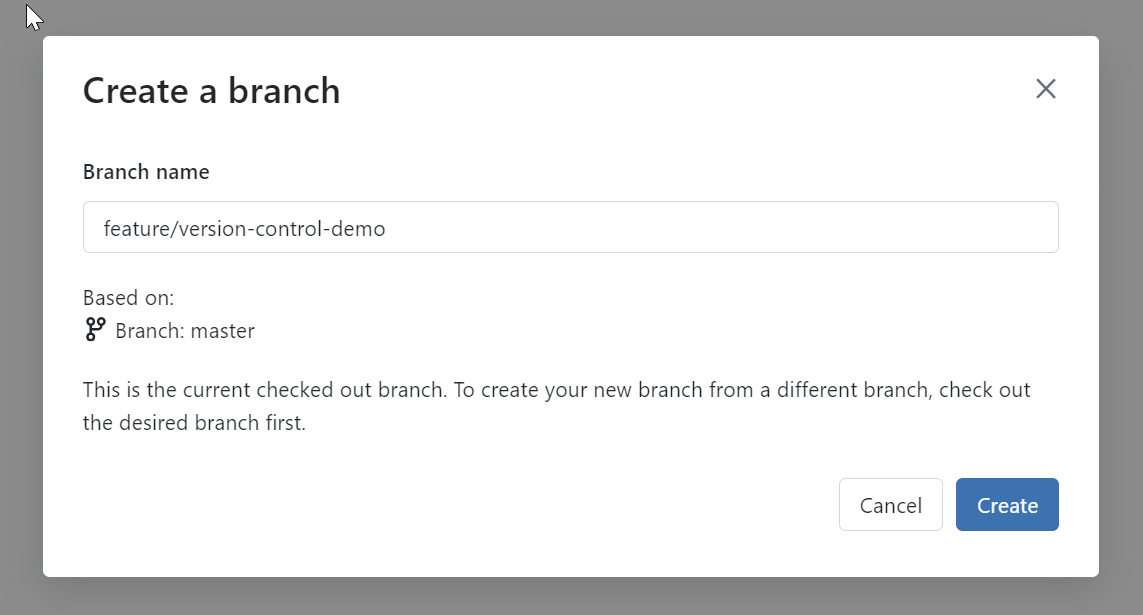
Select Create Branch, and a name, and create the branch.
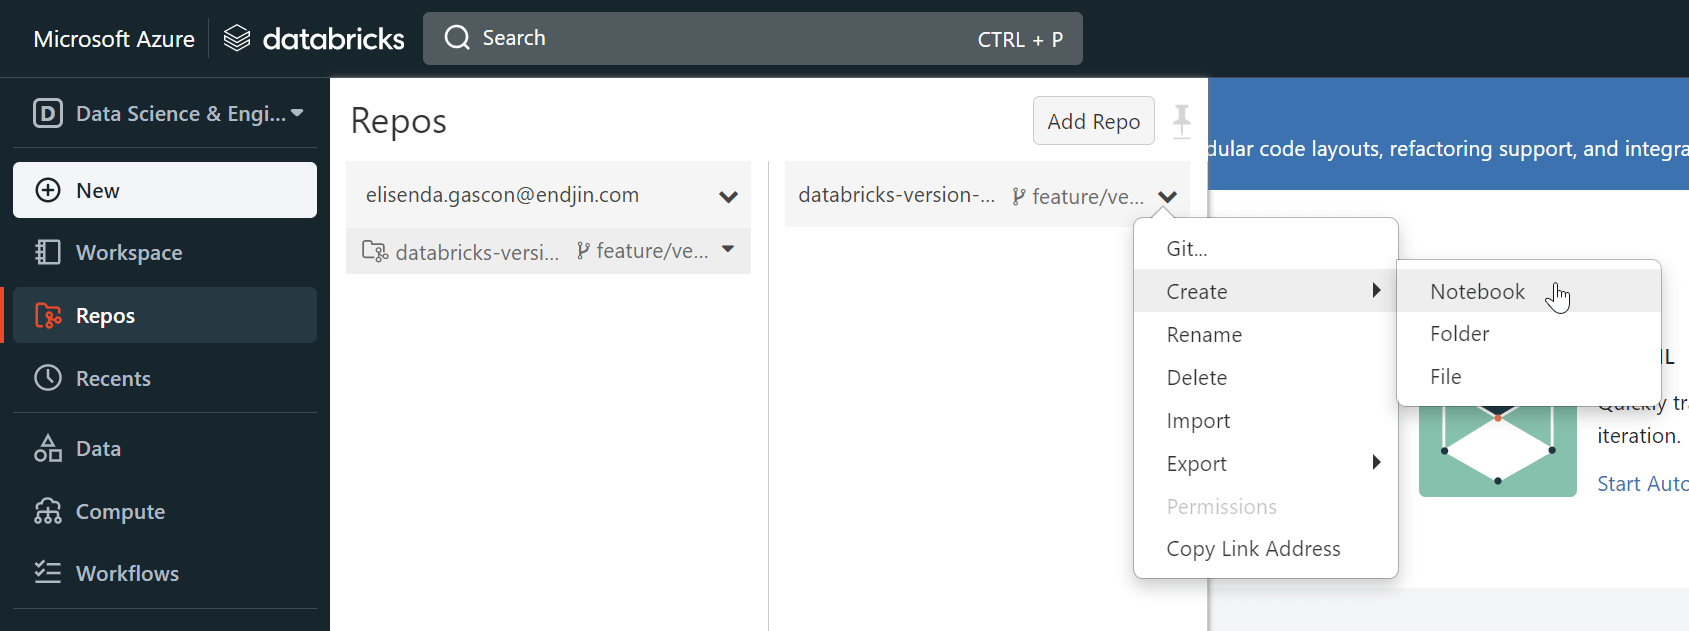
Step 6: Create a notebook
Once in our branch, create a notebook.
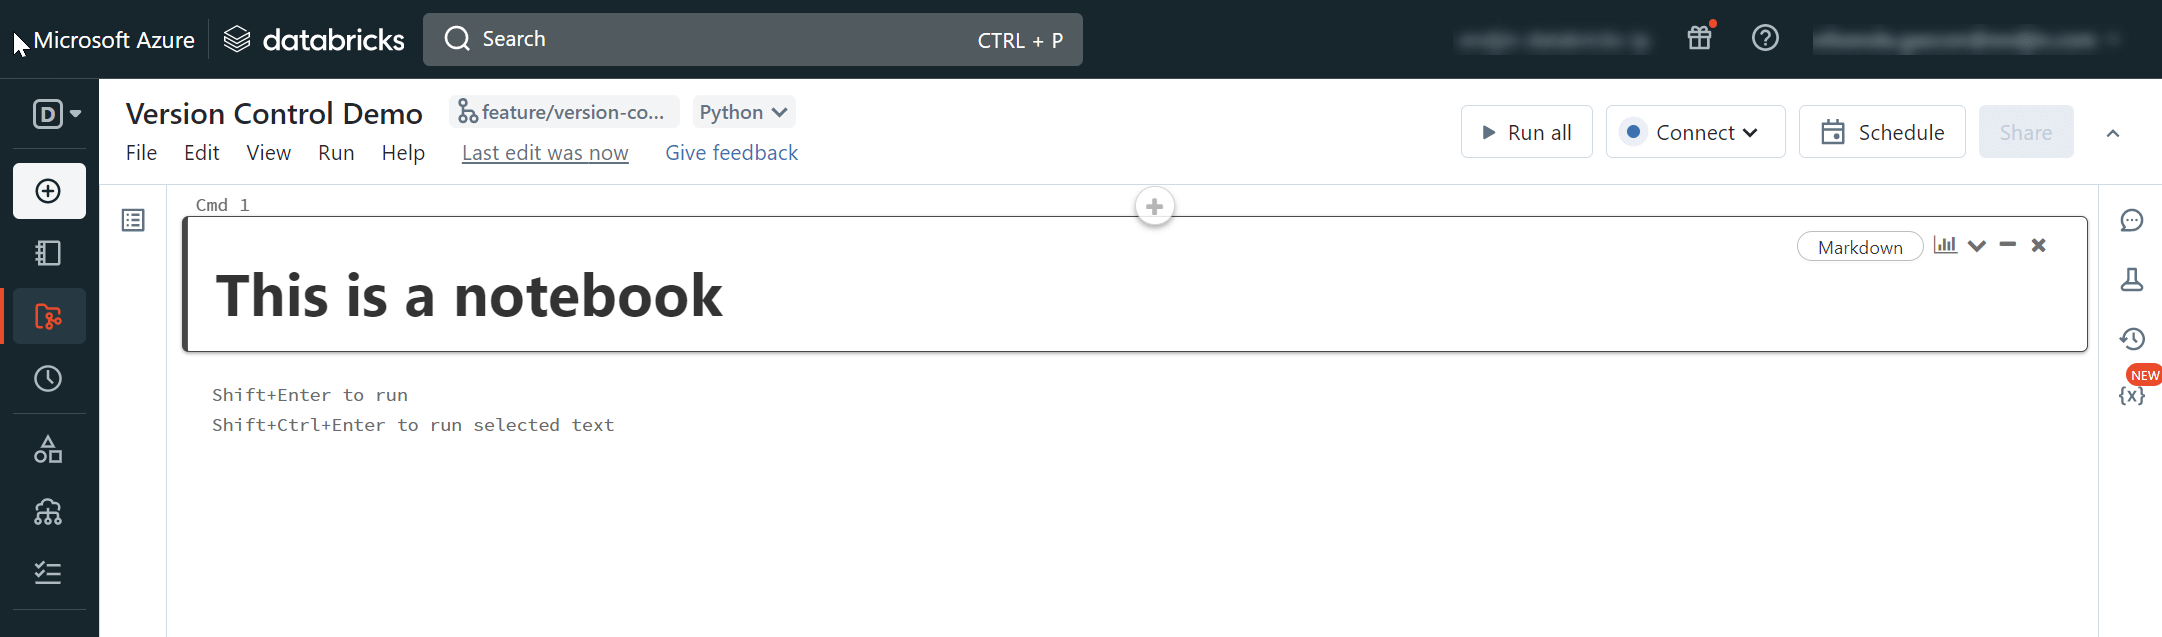
Let's add some markdown to our notebook.
Step 7: Review and commit your changes
Now, let's commit these changes. By selecting our branch again, we see the changes we made. This is very similar to the view you get in GitHub or any other Git provider.
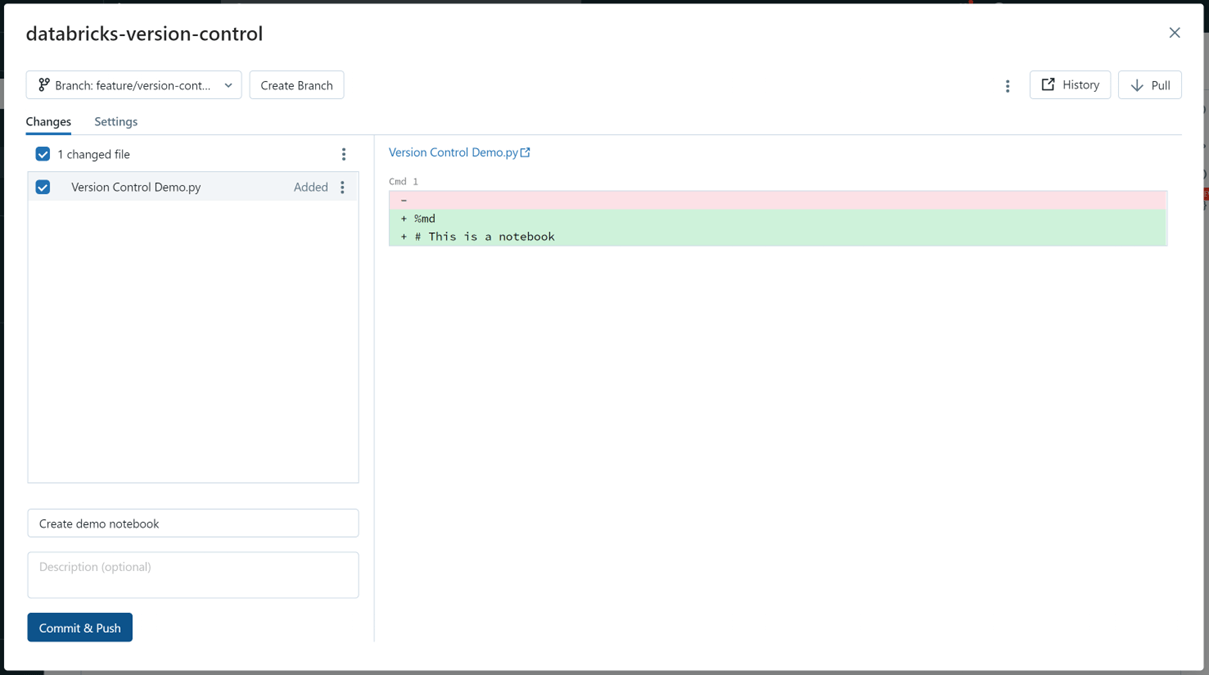
From here, review your changes, add a commit message and description, and commit your changes.
Step 8: Create a PR
Back in GitHub, I can review the changes and create and review a PR like usual.
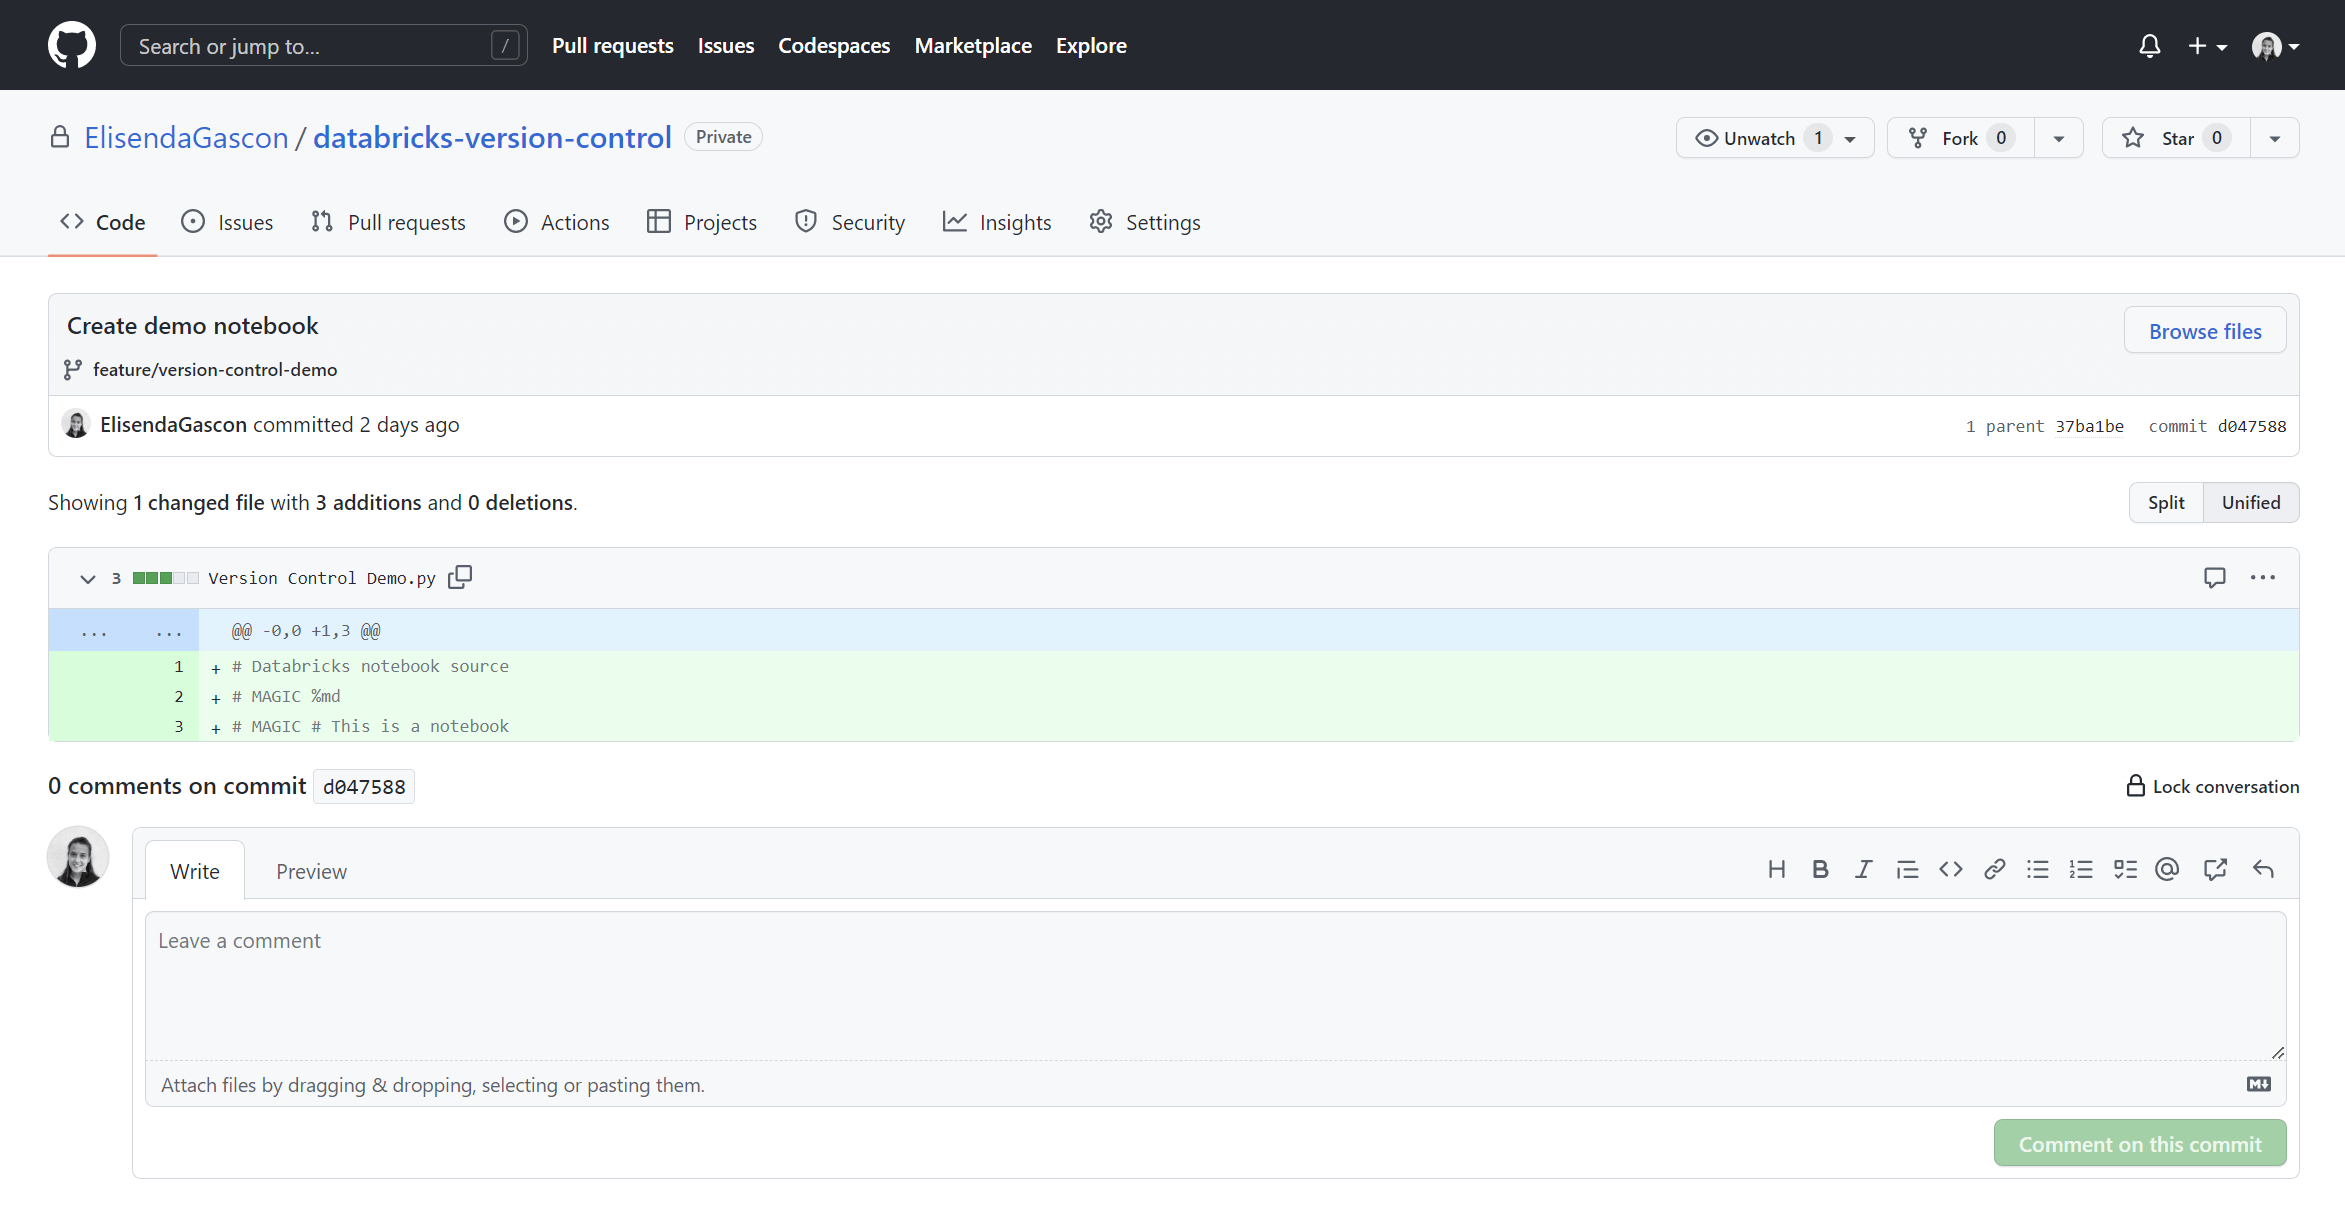
Source control is now set up.
Conclusion
In this post, we have seen how to use version control in Databricks notebooks and how to implement source control using Git integration with Databricks repos. Version control allows developers to easily collaborate on their work by sharing and reviewing changes. With Databricks repos, you can use Git functionality to clone, push and pull from a remote Git repository, manage branches, and compare differences before committing your work. After that, anyone with access to the repo can see the changes and perform tasks such as creating pull requests, merging or deleting branches, and resolving merge conflicts.