Debugging web apps in Visual Studio with custom browser configurations
In this blog post I will explain how you can automatically open a web browser in either private browsing mode or with a custom user profile when debugging web applications from Visual Studio.
Visual Studio automatically detects your installed web browsers, and offers you a choice of which browser to fire up when you start up your web app.
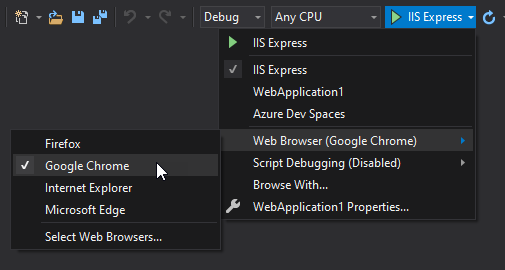
However, this will always default to using the default user profile for the selected browser. When debugging, I find I often want to use either a private browser session (so that cookies aren't persisted), or I'm logging in with test credentials that I do want to persist, but not necessarily on my default browser profile.
Fortunately, all the major browsers (Chrome, Edge, Firefox) support command-line arguments that allow you start them in private browsing mode or with a specified user profile. In Visual Studio, you can create a new browser configuration using the command-line arguments and then use this when starting your web app.
To create a new browser configuration, make sure your web project is set to be the start-up project in Visual Studio, then open the dropdown on the start button and select 'Browse with...'.
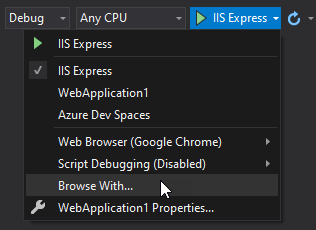
Here you should see the existing browser configurations that Visual Studio has automatically created based on your installed browsers. Find the browser you want to use and copy the path to the executable shown in 'Program' (we'll need this in a moment).
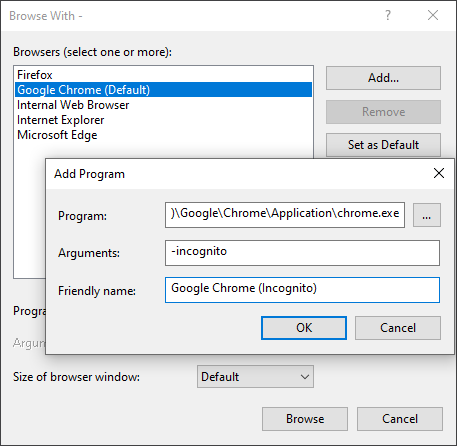
Now select 'Add' to add a new profile. Paste the path you copied into 'Program' and give it a friendly name. The arguments will depend on which browser you want to use and how you want to start it (see Arguments section below).
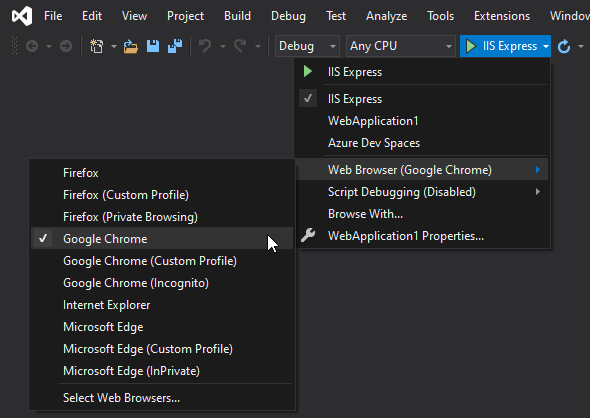
Once you've added the browser configuration, you can now select it from the Start dropdown and Visual Studio will open your app using your selected configuration.
Arguments
Private browsing mode
To start the browser in private browsing mode, use the arguments below.
Chrome (Incognito)
-incognito
Edge (InPrivate)
-inprivate
Firefox (Private Browsing)
-private
(Note: Firefox does not seem to browse to your start-up URL when starting in Private Browsing mode. You will have to manually browse to the URL once the browser window has opened.)
Specific user profile
To start the browser with a specific user profile use the arguments below (replacing <profile-name> with the name of your profile). Note, that if the profile does not exist for the name you specify, all the browsers have slightly different behaviours.
Chrome
--profile-directory="<profile-name>"
If the profile does not exist, Chrome will automatically create the profile for you.
Edge
--profile-directory="<profile-name>"
Edge does not behave well if the profile does not already exist. Moreover, the profile name you need to use is a little hidden.
Once you have created the new profile you wish to use (manually, in the Edge browser), the profile will be given an automatic name (in the format "Profile 1", "Profile 2", etc.) which does not necessarily map to the name you gave your profile.
You can find these profile names as folders in C:\Users\<user>\AppData\Local\Microsoft\Edge\User Data and if you want to know which actual name it maps to, open the Preferences JSON file in the corresponding profile folder and find the profiles.name property.
For <profile-name> in the arguments above, you will need to use the automatically generated name, not the name you gave the profile.
Firefox
-P "<profile-name>"
If the profile does not exist, Firefox will open up the profile manager modal. From here you can create the profile, and next time you run it will open using your created profile.


