Continuous Integration with GitHub Actions
GitHub actions is a DevOps platform that allows you to integrate continuous integration (CI) and continuous delivery (CD) practices with your code repositories in GitHub. In this blog post I will explain what CI is and why you should be using it, and how to implement it in GitHub Actions with an accompanying example Python project.
What is Continuous Integration?
Continuous Integration is a DevOps process and essentially means automating the process of integrating code changes into a code repository. The general idea is as follows: you commit changes to a remote code repository (e.g. GitHub), which triggers an automated build and test process – the committed code is built on a remote server and tests are ran against it. That's the core of CI.
The automation aspect of CI reduces the drama and friction associated with introducing changes to a code base. A major benefit of this is that you get fast feedback as to whether your change is in conflict with changes made by someone else. This encourages small-batch development – the smaller the change, the less likely there is to be a merge conflict, and when there is a conflict it's easier to resolve as only a small amount of code has changed.
Small-batch development is a major aspect of DevOps principles for other reasons in addition to this one: tightens feedback loops, increases developer productivity, increases code quality, lowers risk code deployments. It's key to the idea of delivering continuous value through small, incremental, regular changes.
In addition to indicating merge conflicts, and perhaps more importantly, CI provides fast feedback on the quality and correctness of code through the build and test steps. For this reason, also, CI complements small-batch development. Typically, code that doesn't pass the build and test stages of the CI process will not be automatically merged into the main code base, the process therefore serves as a quality filter around main code base – resulting in less bugs and higher quality code.
In summary, CI is a key component of the DevOps objective of delivering continuous value to customers. It automates part of the process for integrating code changes into a code base and consequently tightens feedback loops, which in-turn increases code quality and complements small-batch development, which has many additional benefits.
Implementing CI with GitHub Actions
GitHub Actions uses a system of events and workflows for executing DevOps processes. For example, when a commit is pushed to main (trigger event), run a workflow that builds and runs tests against the committed code (workflow).
Workflows are essentially a set of tasks to be carried out in response to an event. Workflows are defined in a file written in the YAML syntax that you include in your project repo and track with source control, and push up to GitHub along with your code.
Workflow files are composed of a few different components that I'll quickly run through. First there's the event – the event that triggers a workflow run (e.g. when commit is pushed to main, or a pull request is submitted). Jobs define a sequence of steps. Steps are executed in sequence in the order that they're defined in the job to which they belong; a step is either a shell script to be executed (e.g. a single shell command), or an action to be run. An action is like piece of reusable code that can be run on the GitHub Actions platform for performing common tasks. Many actions are provided or supported by GitHub, for example the actions/checkout@v3 action is very commonly used and you'll see it in the example below.
The terminology for the different components involved in using GitHub actions can be slightly confusing at first, the example below should help you to see how the pieces fit together. This Understanding GitGub Actions article on GitHub is also a helpful guide.
Example Python project
I have put together a simple Python repo to demonstrate how to implement CI with GitHub Actions. the structure of the repository is shown below.
shapes
 ┣ .github
 ┃ ┗ workflows
 ┃ ┃ ┗ python-app.yml
 ┣ shapes
 ┃ ┣ shapes_2d.py
 ┃ ┣ shapes_3d.py
 ┃ ┗ __init__.py
 ┣ tests
 ┃ ┣ test_shapes_2d
 ┃ ┃ ┗ test_circle.py
 ┃ ┣ test_shapes_3d
 ┃ ┃ ┗ test_sphere.py
 ┣ poetry.lock
 ┣ pyproject.toml
 ┗ README.md
There are some other files and folders (like .venv and .gitignore) that are in my repository but are not shown in the diagram above as they're not relevant to the topic of this blog post.
We have a couple of Python modules inside the shapes folder - shapes_2d.py and shapes_3d.py - which contain some source code for working with shapes, for example shapes_2d.py looks like this…
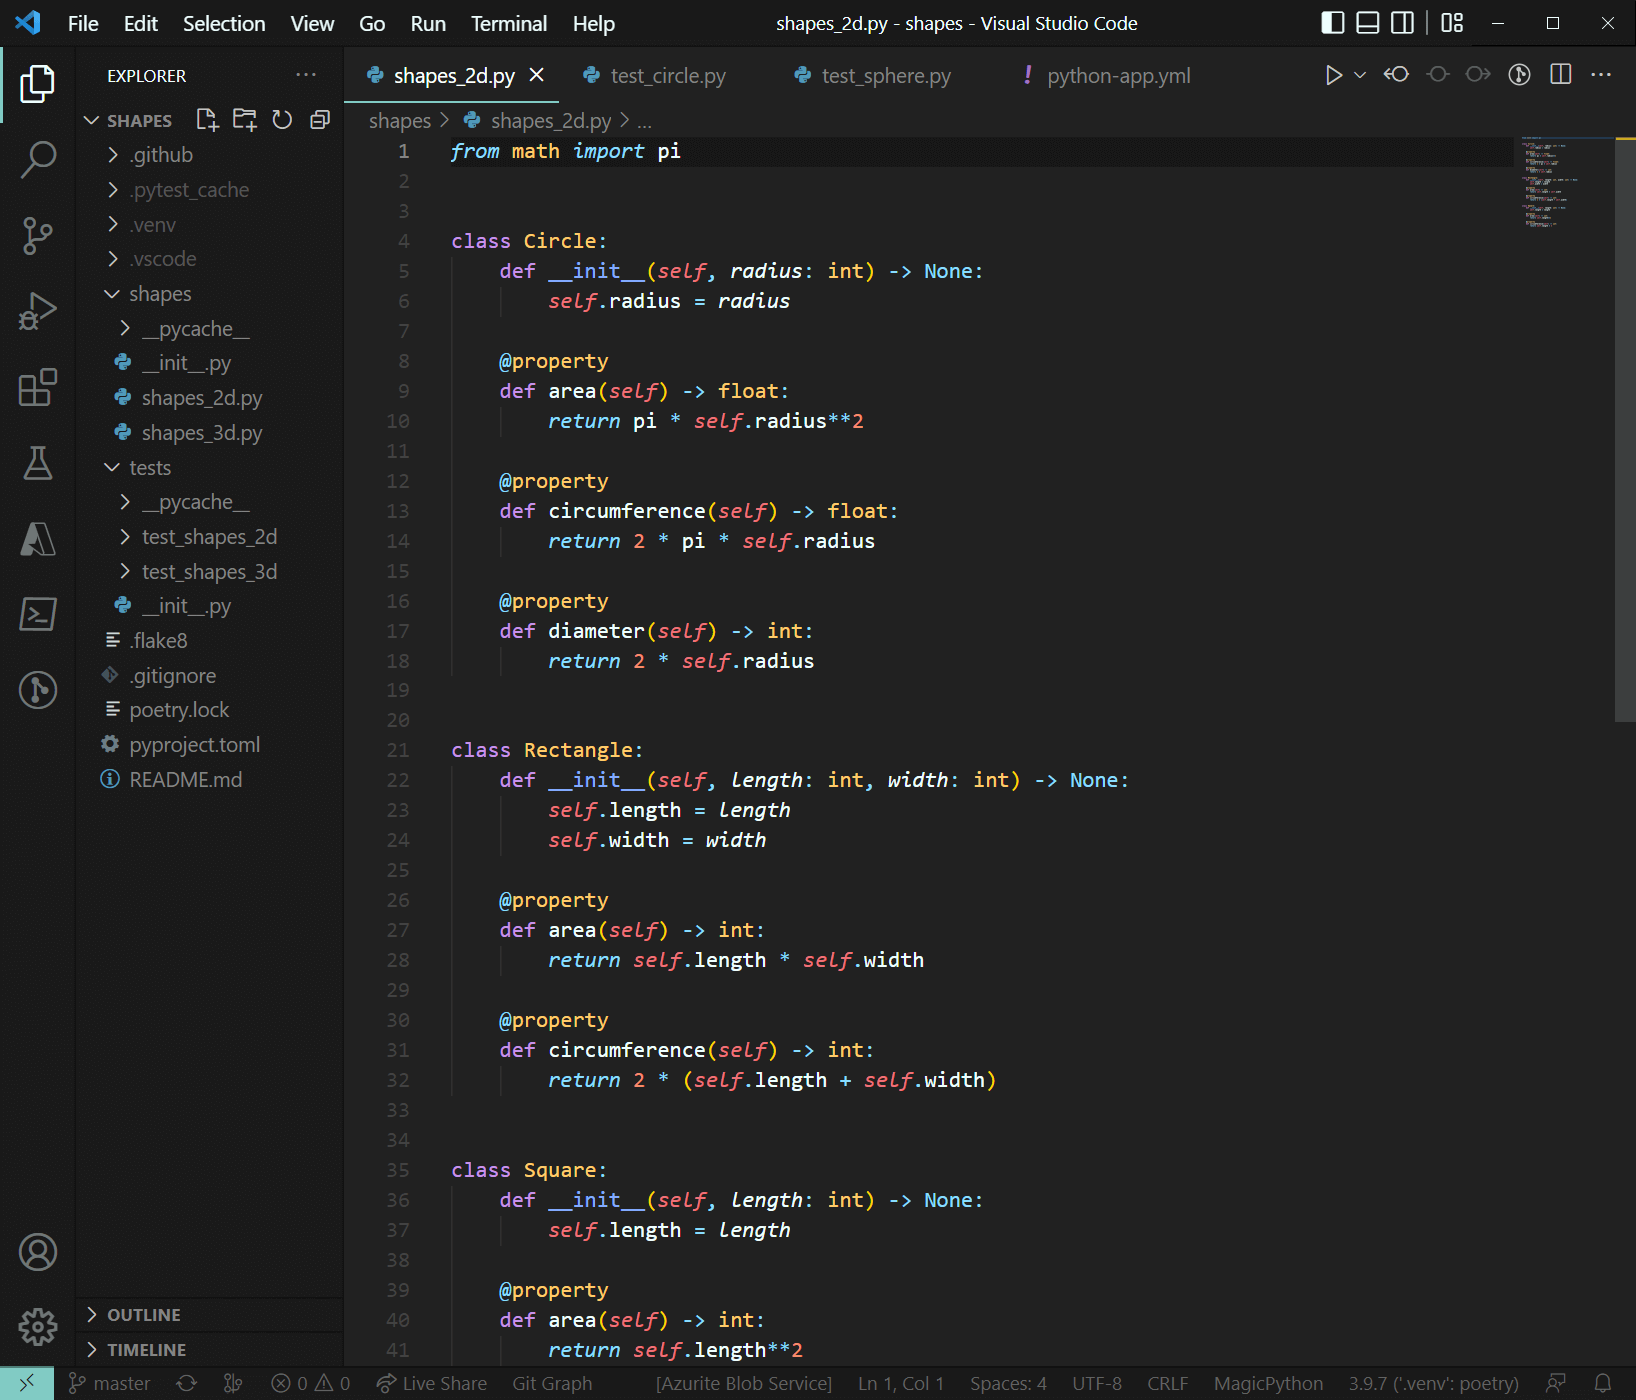
We also have some test code underneath the test folder, for example test_circle.py looks like this…

The workflow file
Inside the .github\workflows\ directory at the root of the repo is the workflow file for this repo: python-app.yml. .github\workflows\ is the well-known directory that GitHub Actions looks in for workflow files, so be sure to store them here.
name: Python package

on: [push]

jobs:
  build:
    runs-on: ubuntu-latest
    strategy:
      matrix:
        python-version: ["3.9", "3.10"]

    steps:
      - uses: actions/checkout@v3
      - name: Install Poetry
        run: pipx install poetry
      - name: Set up Python ${{ matrix.python-version }}
        uses: actions/setup-python@v4
        with:
          python-version: ${{ matrix.python-version }}
          cache: "poetry"
      - name: Install dependencies
        run: poetry install
      - name: Test with Pytest
        run: poetry run pytest
      - name: Lint with flake8
        run: poetry run flake8
Let's walk through this workflow file step-by-step.
name: Python package
Specifies the name of the workflow.
on: [push]
Specifies the trigger for the workflow. I'm using the push event, meaning the workflow will be triggered whenever a commit is pushed to the repo.
Next, jobs: is the key whose children are jobs. There is a single job in this workflow called Build, the child keys of this define the properties of the job, the first of which is
runs-on: ubuntu-latest
This specifies the OS on the VM (or what GitHub calls a runner) that the job will run on to be the latest version of Ubuntu.
Next, we have
    strategy:
      matrix:
        python-version: ["3.9", "3.10"]
The Strategy key allows you to define a matrix of job configurations, this allows you to create multiple job runs – one for each combination of the variables specified, that all run when the workflow is triggered. So, in this case we have python-version: ["3.9", "3.10"], which means that whenever this workflow is triggered, this job will get ran twice: once using Python 3.9 and once using Python 3.10. You can also define a matrix of operating systems, e.g. os: [ubuntu-latest, windows-latest]. If I were to also have that in my example, this job would be ran four times for each combination of python-version x os.
Next is the steps key, which is a child of the job id (build), and this is the heart of the job: it defines the steps that define the work that the job executes. As I mentioned earlier, a step is either a shell script (which can just be a single command) or an Action.
The first step of the build job is
- uses: actions/checkout@v3
which will run version 3 of the actions/checkout action. This is an action created by GitHub and one that you'll frequently come across; it copies your repository onto the VM to allow the workflow to run scripts and actions against a copy of the code without changing the actual repo.
The next step is
- name: Install Poetry
  run: pipx install poetry
The name of the step, 'Install Poetry', will appear in the workflow run viewer on GitHub. It executes the shell command pipx install poetry, this installs a Python package called Poetry which is the dependency management tool I'm using in this project.
The next step is
- name: Set up Python ${{ matrix.python-version }}
  uses: actions/setup-python@v4
  with:
    python-version: ${{ matrix.python-version }}
    cache: "poetry"
Here I'm using what GitHub call contexts in the name of the step. Contexts are objects that contain properties which hold information that you can access, in this case I'm accessing the python-version property on the matrix context object. The dollar and braces are for string interpolation.
This step uses the action/setup-python@v4 action, which GitHub recommend you use when using GitHub Actions with Python projects, its basic function is to install a version of Python and add it to the PATH environment variable. The with keyword allows you to define values for input parameters on the action, here I'm passing in the values ${{ matrix.python-version }} and "poetry" for the parameters python-version and cache respectively.
The next step,
- name: Install dependencies
  run: poetry install
runs poetry install which installs the project's dependencies specified in the poetry.lock file in the repo. This is an important point when using GitHub actions: you need to ensure the environment inside the VM on which your code is being ran has the necessary dependencies installed that your code requires. More broadly, you want the environment on the runner VM to mirror the production environment in which your code will run.
- name: Test with Pytest
  run: poetry run pytest
This step runs the unit tests defined in the repo.
- name: Lint with flake8
  run: poetry run flake8
And finally, this step runs the linter over the code.
Viewing workflow runs in GitHub

The image above shows the results of a single workflow run under the Actions tab in GitHub for this repository. Fix Linting Issues was the message added to the commit that triggered this particular workflow run. You can see that the two jobs, for the two different versions of Python specified in the matrix, have ran successfully.
You can also see the steps that make up the job (the 'build (3.9)' job in this case), with the names here corresponding to the names we provided in the YAML file. Each of these steps is expandable in the UI, so you can peak into the work that each of the steps has performed.
@lg_mooney | @endjin.com

