A Step-by-step guide to setting up CucumberJS in Visual Studio 2015

At endjin, we love using Gherkin, from "unit"-style tests, all the way through to Integration and User Acceptance testing. In the .NET world, we make use of SpecFlow which has great integration with Visual Studio.
With Visual Studio 2015 and its new support for npm/grunt, setting up CucumberJS for gherkin-style testing of JavaScript is pretty straightforward.
1) Add a package.json file to your project
This gives you support for npm-style package management. It works in any type of project, not just the new-style ASP.NET build system.
2) Add dependencies for cucumber, grunt and grunt-cucumber.
Grunt-Cucumber is a simple (and easily customized) grunt execution engine for CucumberJS.
3) Add a gruntfile.js to your project
This allows you to configure grunt to execute your task
4) Add some configuration for grunt-cucumber
The src option gives the relative path to the folder containing your feature files. The steps option gives the relative path to your step definitions.
5) Add a .feature file for your Gherkin spec, and a step-definition JavaScript file

Here's an example feature file:
And the example step definitions
6) Build the solution
You have to do this to get the packages pulled down.
7) Open up Task Runner Explorer
Right click the gruntfile, and open Task Runner Explorer
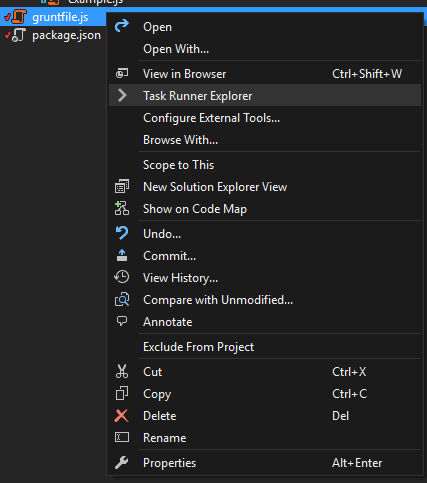
You can see the cucumberjs task in the tree, and a set of bindings for various build events.
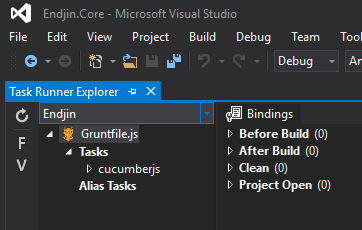
8) Run the specs
Double click the cucumberjs node to run your specs
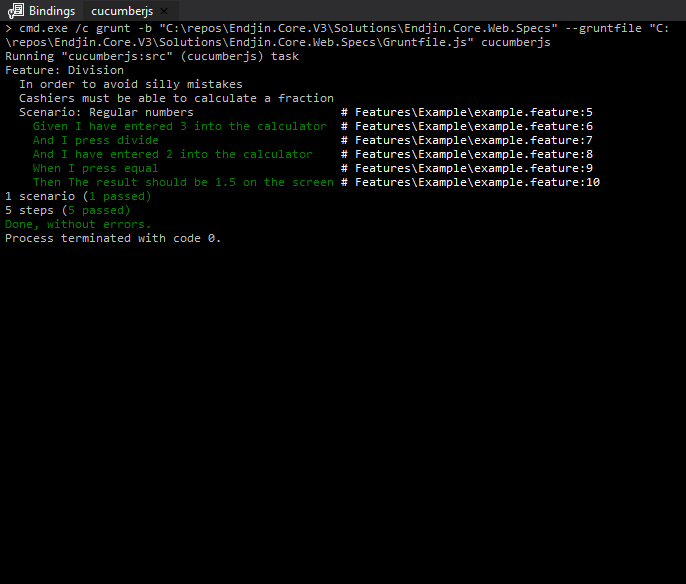
9) Integrate with the build
If you want to, you can hook your grunt-cucumber task into the build. Right click the cucumberjs node and select Bindings->After build.
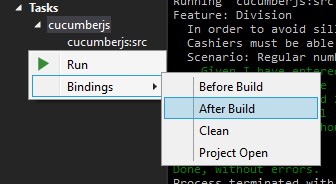
This actually adds a bit of code into the top of your gruntfile.js
Now, when you build, it will re-run your specs.
For more sophisticated build environments, you can get cucumber to spit out JSON output instead of pretty-printing, and then consume that as part of your continuous integration process.


