Using Azure Resource Manager and PowerShell DSC to create and provision a VM
Previously each component in Azure was deployed, managed, billed and monitored separately. Azure Resource Manager (ARM) is a new approach that allows you to declaratively state what a group of Azure infrastructure should look like as a template, then deploy that template in an idempotent way (i.e. you can run it multiple times and it will add any missing resources and just leave the rest in place).
That resource group can then be managed, billed and monitored as a single unit. You'll need to use the preview version of the management portal to see resource groups and the resources deployed using ARM.
PowerShell Desired State Configuration (DSC) is a declarative model that enables autonomous and idempotent deployment and configuration of Windows resources. While the resource manager template can be used to deploy infrastructure such as virtual machines, PowerShell can be used to provision those VMs once they have been created. ARM templates allow you to specify VM extensions, two of which allow you to run DSC scripts or custom scripts.
You'll want to download and install Azure SDK 2.6 (or higher), as it allows you to create and edit Azure Resource Manager templates in Visual Studio. The JSON editor gives you a template specific editing experience, allowing you to select and configure a particular resource, rather than manually adding JSON to the template. It also allows you to deploy the template directly from Visual Studio, which simply uses PowerShell so you can do it in a straightforward way outside VS as well.
Creating the template
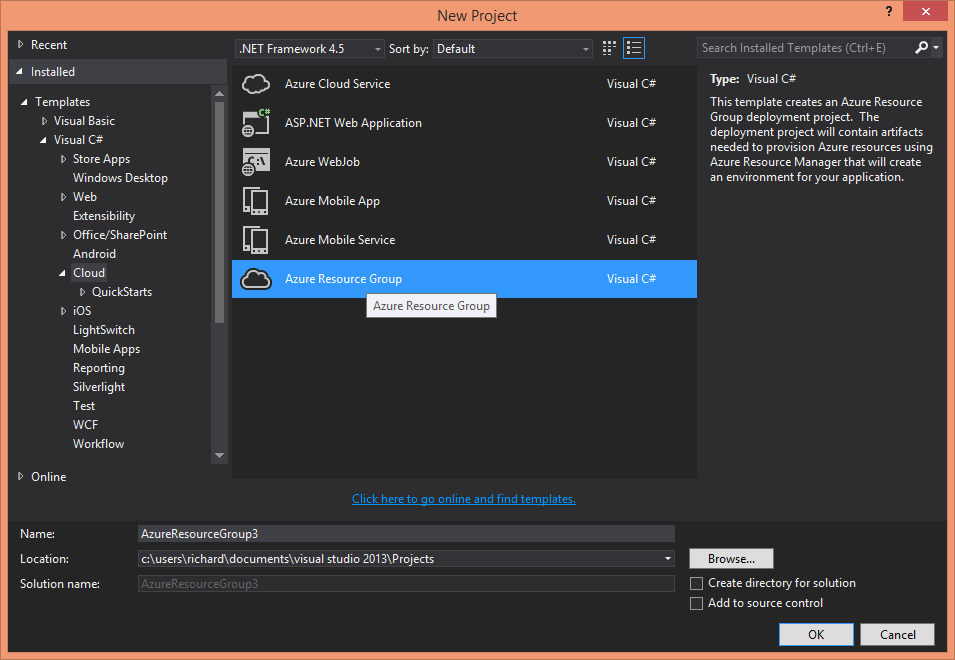
Create a New Project. If you've got Azure SDK 2.6 installed, you'll see a project called "Azure Resource Group" under Cloud templates.
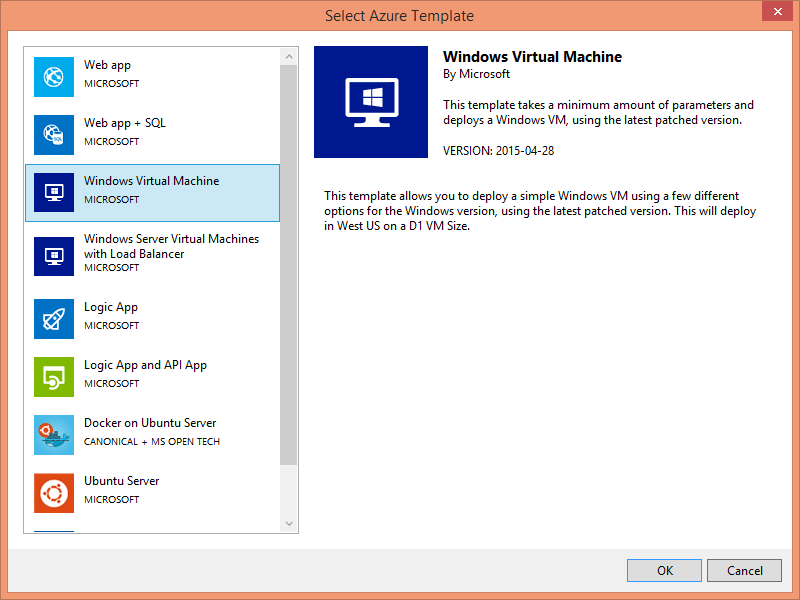
You can create a completely blank template, or pick from a handful of existing templates. For this example, I've picked the Windows Virtual machine template.
The newly created project contains a PowerShell deployment script, a JSON template, a JSON parameters file and a version of AzCopy.exe (which allows you to upload artefacts from a local path to a storage account container).

Opening the WindowsVirtualMachine.json template shows you the file itself along with a JSON Outline window. The template consists of three main sections: parameters, variables and resources.

Exploring the template, the virtual machine resource looks like this:
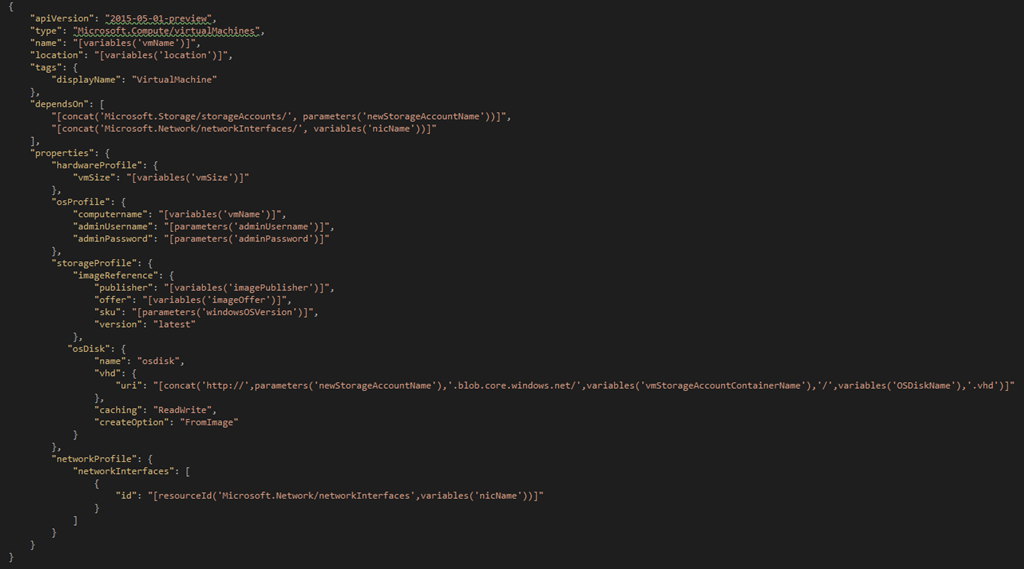
I made a couple of tweaks to the default variables that are created with this template. Location was changed from West US to North Europe, and VM Size was changed from D1 to A1. Tweak the settings as you see fit.

Add a new resource by right-clicking on the resources section in the JSON Outline window.

Select the PowerShell DSC Extension resource and give it a name, e.g. dscExt.

The extension is added as a sub-resource of the virtual machine resource selected.

Clicking on the extension resource in the JSON Outline window takes you directly to that section in the JSON file itself.

I've made a few tweaks to the extension JSON that is inserted for you. The version has been changed to 2.0 as this is the latest major version and contains improvements. The autoUpgradeMinorVersion property has been added, which at the time of testing this template caused version 2.1.1.0 to be used.
Finally the settings parameters have been simplified. "modulesUrl" should be a URL where your DSC configuration package is accessible from the VM – for example hosted on GitHub or a publically accessible Azure storage blob container. "configurationFunction" should be in the format "Provision-VM.ps1\FileResourceDemo", depending on how you name your script and configuration resource in the next section.
It is also possible to get the DSC package from a private blob container, by using a shared access token and providing that to the extension via the "sasToken" property.
Create the DSC scripts
Create a new PowerShell script with the contents matching the following snippet:
This is a DSC configuration that ensures a file is present on the virtual machine, using the File resource. There are a number of built-in DSC resources. The File resource is one of the built-in ones and is for managing files and directories on target nodes. There are also many more resources available that can be downloaded.
Upload DSC scripts to storage
Next we need to upload this DSC script to a location that is accessible when the resource manager template is deployed. The easiest place to do this is in an Azure storage account.
Assuming you have Azure PowerShell installed and ready to go (if not go here first), complete the following steps:
Initialize the PowerShell session with your subscriptions, by authenticating through Windows Azure Active Directory:
Login-AzureRmAccount
Make sure you set the subscription you want to work in, if you have more than a single subscription in your directory:
Set-AzureRmContext –SubscriptionName "yourSubscriptionName"
Package your DSC script and publish to the storage account for the active subscription in this PowerShell session:
Publish-AzureRmVMDscConfiguration -ConfigurationPath "C:\path-to-your-script\Provision-VM.ps1" -StorageAccountName "yourStorageAccoutName"
Deploy the template
To deploy the template, right-click the solution in the Solution Explorer window and select 'Deploy' then 'New Deployment'. You'll see a window like this:

First select the subscription you wish to deploy to. Then select an existing resource group, or create a new one:

Once the Resource Group has finished creating, click the Edit Parameters button to set the various parameters the template needs. If you changed the parameters used in the extension as I did above:
- The modulesUrl parameter should be the URI for the blob container that you uploaded your DSC package to.
- The configurationFunction parameter should be the name of the script file followed by the name of your configuration function, e.g. Provision-VM.ps1\FileResourceDemo
- The other parameters such as storage account name and admin username are up to your discretion.
If you left them as they were by default:
- The
_artifactsLocationparameter should be the URI for the blob container that you uploaded your DSC package to. - The
dscConfigurationFileparameter should be the name of your DSC package e.g. VM-Provision.ps1.zip - The
dscExtConfigurationFunctionparameter should be the name of the script file followed by the name of your configuration function, e.g. Provision-VM.ps1\FileResourceDemo - The other parameters such as storage account name and admin username are up to your discretion.
Click Deploy. In the Output window you'll see the output of the PowerShell script listing as your resources get successfully deployed (or displaying any failures and errors).
[VERBOSE] 15:48:26 - Created resource group 'AzureResourceGroup3' in location 'northeurope'
[VERBOSE] 15:48:26 - Template is valid.
[VERBOSE] 15:48:27 - Create template deployment 'windowsvirtualmachine'.
[VERBOSE] 15:48:32 - Resource Microsoft.Storage/storageAccounts 'vmwithprovisioning' provisioning status is succeeded
[VERBOSE] 15:48:34 - Resource Microsoft.Network/virtualNetworks 'MyVNET' provisioning status is succeeded
[VERBOSE] 15:48:55 - Resource Microsoft.Network/publicIPAddresses 'myPublicIP' provisioning status is succeeded
[VERBOSE] 15:48:57 - Resource Microsoft.Network/networkInterfaces 'myVMNic' provisioning status is succeeded
[VERBOSE] 15:49:00 - Resource Microsoft.Compute/virtualMachines 'MyWindowsVM' provisioning status is running
[VERBOSE] 15:53:22 - Resource Microsoft.Compute/virtualMachines 'MyWindowsVM' provisioning status is succeeded
[VERBOSE] 15:53:25 - Resource Microsoft.Compute/virtualMachines/extensions 'MyWindowsVM/dscExt' provisioning status is running
[VERBOSE] 16:04:43 - Resource Microsoft.Compute/virtualMachines/extensions 'MyWindowsVM/dscExt' provisioning status is succeeded
Successfully deployed template 'c:\users\richard\documents\visual studio 2013\projects\azureresourcegroup3\templates\windowsvirtualmachine.json' to resource group 'AzureResourceGroup3'.
If the DSC extension has failed for any reason and the error is not clear enough to fix, you can connect to the VM using remote desktop to investigate why.
You'll find a folder matching the DSC extension version number under C:\Packages\Plugins\Microsoft.PowerShell.DSC. Within this folder:
- In the RuntimeSettings folder there is a file that will allow you to validate that the settings from the Azure Resource Manager template are correct.
- In the Status folder there is a file that will let you know what happened when the extension ran e.g. an error message if there was a problem.
- In the DSCWork folder, there is a configuration and localhost.mof file which can be run locally, as if they had been executed by the extension, which could help you analyse the output and diagnose the issue.

