Speed kills: decrease page load time and increase conversions with Azure CDN

It is well known that decreasing page load time can drastically increase conversions, directly affecting your business's revenues. Even if that is not your major concern, all web apps benefit from speedy page load times.
One technique that all sites can take advantage of is a CDN.
A CDN, short for Content Delivery Network, is essentially a network of servers set-up, in various geographic locations, with the aim of speeding up the delivery of content to end-users across the Internet.
By calculating the 'shortest' route available to the originating request, a CDN can improve performance as it serves cached pages, images, scripts, media files, etc. from servers that are as close as possible to users. Proximity decreases the number of hops data must travel through to reach its destination and reduces latency, time-outs or data packet loss. Other factors such as capacity and cost can also affect which server will handle a particular incoming request.
All servers that are part of a delivery network (aka 'Edge' servers) keep copies of the assets available on the CDN. They are effectively acting as cache proxies for the 'Origin' server. If a request is made for a resource that has not yet been added to its cache or the cache entry has simply expired, the edge server will communicate with the origin server, request the missing content and cache it.
Besides better performance resulting in improved user experience, other advantages usually associated with a CDN are reliability and availability. A CDN can also help deal with sudden increases in demand by offloading traffic from the content provider to multiple edge servers.
So how do you setup a CDN on Azure for a web app? To state the obvious, we first need a web app…
Azure Web App Setup
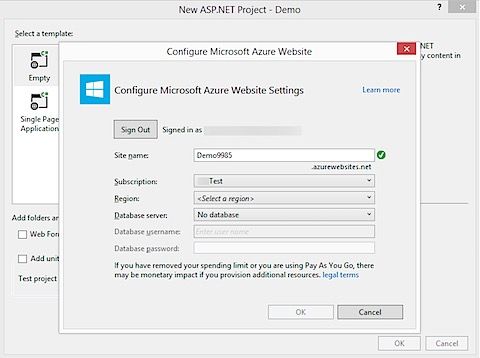
Let's create a simple demo website with Visual Studio. Go File > New > Project and select the ASP.NET Web Application project. When presented with the New ASP.NET Project dialog, select the Empty template and tick the Host in the cloud checkbox. Press OK.

You will then be prompted to configure your Azure website as shown below:
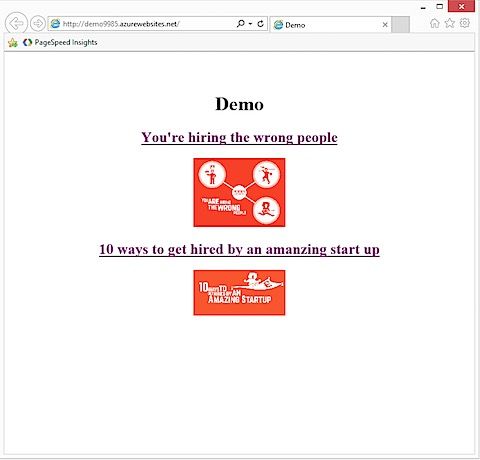
The demo site has only one page called index.html.

The page itself displays some text and two images, which will be served at this point by the web app.

After running the site locally and seeing the images being displayed, I published the site to Azure. Right-click on your web project and select Publish.

If everything went smoothly, you should see your app running in the cloud.
Azure CDN Setup
Now that we've got a web app running, we can setup the CDN. At the time of writing, the 'new' Azure portal would not let you do that so you have to head over to the 'old' portal. Once you've signed in to the portal and selected the appropriate subscription, click on the New button. In the NEW panel, select APP SERVICES > CDN > QUICK CREATE. The dropdown under ORIGIN DOMAIN should let you select the website for which you want to use the CDN (http://demo9985.azurewebsites.net in my case).
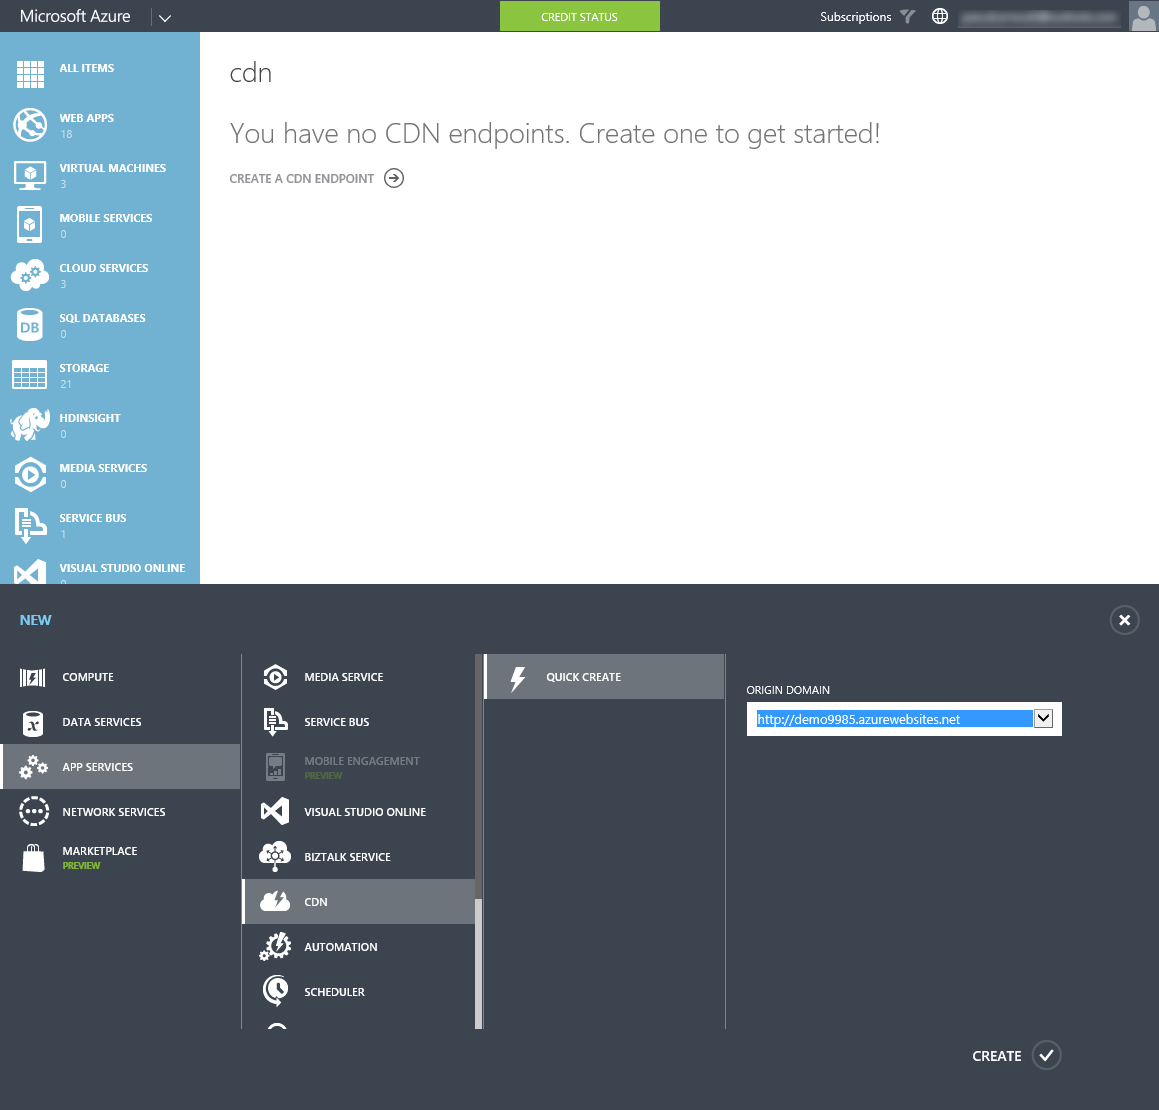
After only a few minutes, your CDN is up and running, ready to serve.

Once Azure has successfully provisioned the new CDN, it will expose an endpoint based on the CDN name:

It is a good time to note at this stage that you can use blob storage instead of your website as the origin. This post describes how to do that: Serve Content from Azure CDN in Your Web Application
Using the CDN
To serve any content from the CDN, simply copy the endpoint and append the resource's relative path to it.
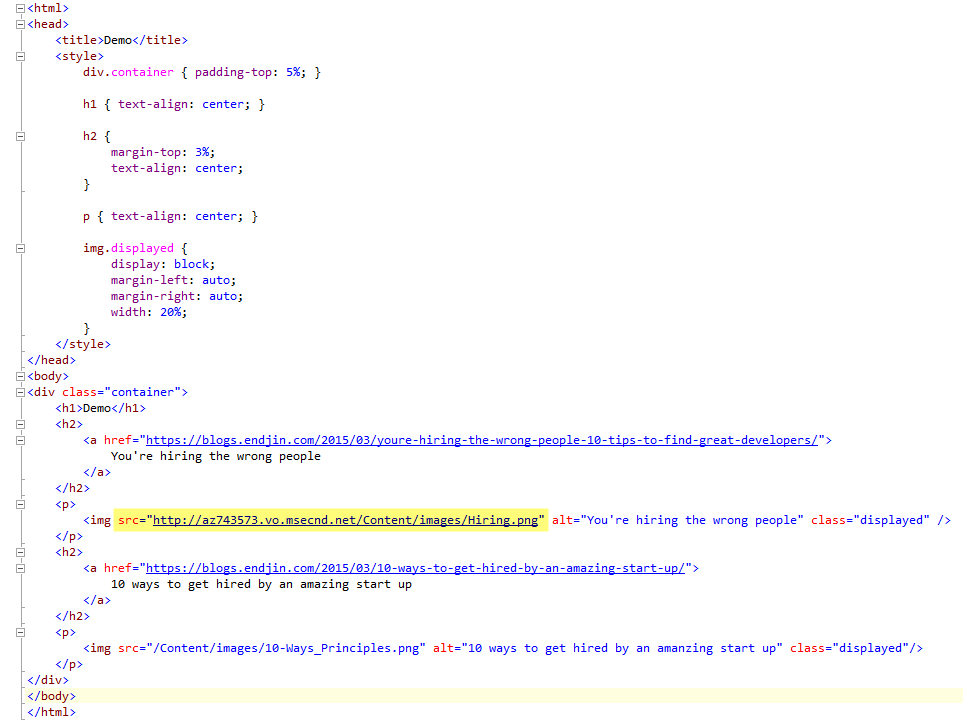
As I wanted to quickly check the perf impact of using the CDN, I amended the test page so that the same image gets delivered by both the CDN and the web app.

A modest test but the result is convincing enough:

Strategies to deal with changing assets
A CDN is mainly setup to serve static content but inevitably images, documents, scripts, etc. will change over time. How do you then get the CDN to re-request the updated asset?
Your first option is to simply rename the asset. Another option is to copy the updated content into a new folder on your website and modify the path to it in your page. A more appealing option however is to enable versioning via query string:

Once this is enabled, you can append the resource path with a query string. Every time the query string changes, the edge servers will re-request the content if they haven't yet cached it based on the query string parameter value. Adding the query string parameter below and incrementing its value in my test page, was sufficient for the image to be refreshed automatically:
<img src="http://az743573.vo.msecnd.net/Content/images/Hiring.png**?v=1.0.0**" alt="You're hiring the wrong people" class="displayed" />
If you have many resources which you want delivered via the CDN, you should set the endpoint in config and automatically generate the version query parameter value. Either use config or increment it automatically based on a release number or deployment id.
Voilà! All pretty straight forward.
A note on caching
Unfortunately there is currently no way to know what has been cached on the CDN. You can't remove or expire specific items, or even purge the whole content either. The only thing you can do is disable, delete or recreate the CDN.
Note that you can however control how long an item remains in the cache. When you set the cache expiration for static content in your Web.config, the same settings will be applied by the CDN. For an example on how to do that, check this excellent post by Cephas Lin.
Azure CDN Pricing
You're now probably asking yourself how much does it all cost?
The good news is that there is no set-up fee and you won't have to pay anything... that is until you actually make use of it.
Charges are calculated based on the amount of data transferred and the zone where the edge server delivering the content to the user is located. This means that if a file is requested by someone in France (Zone 1) but served by a CDN node in Tokyo (Zone 2), the tariff for Zone 2 (not Zone 1) will be applied to your bill.
Egress data transfer charges are currently higher in Zone 2 (Latin America, Middle East, Africa and Asia Pacific) than in Zone 1 (North America and Europe) and are calculated per GB through regressive pricing. The more you consume the less you pay per GB.
At the time of writing, the first 10TB were charged at $0.087/GB and $0.08/GB for the next 40TB in Zone 1. This means that 50TB costs $4,167.68 if all the content is delivered by edge servers located in Zone 1. To bring this back to some number I can comprehend, 1TB would cost me just over $89 for Zone 1 but $141 for Zone 2! Since you have no control over which zone your data is served from, chances is that you'll probably end up paying somewhere in between as data could be transferred from either zone.
On top of the CDN charges, you also need to budget for the cost of transferring data from the origin to the CDN. Every time the CDN makes a request for a cached item that has expired or for a new resource, data transfer charges from the origin will apply. If you plan on using a CDN, first understand your content, usage patterns and traffic data. Plan carefully for cache churn and limit the amount of 'dynamic' content served by the CDN. This will ensure you won't pay over the odds for your CDN.
Full pricing details can be found here.
While not all websites need the scalability and performance optimisation afforded by a CDN, it is a critical component for sites that have global reach and deal with high and fluctuating volumes of traffic. Azure offers an easy as well as cost effective way of setting one up. You should check it out.
Links
Azure Media Services and CDN Integration
Azure Friday - Azure Websites CDN Support with Yochay Kiriaty

