Equipping a kick-ass meeting room for less than £1500
Update January 2015: we've purchased a number of NUC devices and have found some better components - these are now listed.
Everyone knows that having a good working environment makes for a happier and more productive team. My first pet project for 2014 was to kit out our new meeting room and turn it into a collaboration and meeting space that we use on a daily basis for solution design & pairing sessions, conference calls with our clients, partners and remote workers as well as lunch time brown bag training sessions.
The Whiteboard
Before we moved into the new office – I'd been doing a bit of research on the latest ideas and innovations in collaboration spaces – the most exciting of which is IdeaPaint – which allows you to paint any smooth surface and turn it into a whiteboard. Fantastic idea and a great product – the only problem is that the office we finally settled on is mainly exposed brickwork (and listed) so we can't use it.
After quite a bit of research – we settled on an "educational quality" 2400mm x 1200mm magnetic whiteboard from Pitts Presentation. I think the important word from the last sentence is "magnetic", if you use user stories for planning your software projects then these are incredibly useful for sorting and organising when you stick cards to the whiteboard with magnets. The "educational quality" bit means that it's got a hard wearing enamel coating. The whiteboard also makes for a good projector screen.
The Meeting Room PC
When we starting specifying our Dev Rigs last year, I became a fan of Linus Tech Tips and saw one of his Intel Next Unit of Compute unboxing videos and was quite impressed by the device. In the last 12 months the NUCs have iteratively and incrementally been improved. The latest version is based on the Haswell architecture, which adds not only more computing power, but significantly reduces the power consumption of the device, which reduces the heat and associated noise of the device. I decided on the i5 version of the barebones kit.
We wanted to use the device to connect to a HD projector, so that we could then RDP into our Dev Rigs for doing pairing sessions, running presentations or playing HD videos.
The device is lovely; it comes in minimal packaging which is also wonderfully compact and has a few nice surprises. Unlike previous NUCs the D54250WYK comes with it's own power cord, so you don't need to order that separately.

Considering how powerful the device is – it's tiny; it's amazing the space saving you can make when you abandon any legacy hardware and just support the latest generation of chipset and connections:

The photo below shows the rear of the device. It sports a power connector, mini DisplayPort 1.2 (capable of driving a 4K monitor), a mini HDMI 1.4a port, Intel® Gigabit Ethernet Controller, two USB 3.0 ports and the two big heating vents at the top.

The front of the device has two USB 3.0 ports, a headphone / microphone jack and a consumer IR sensor:
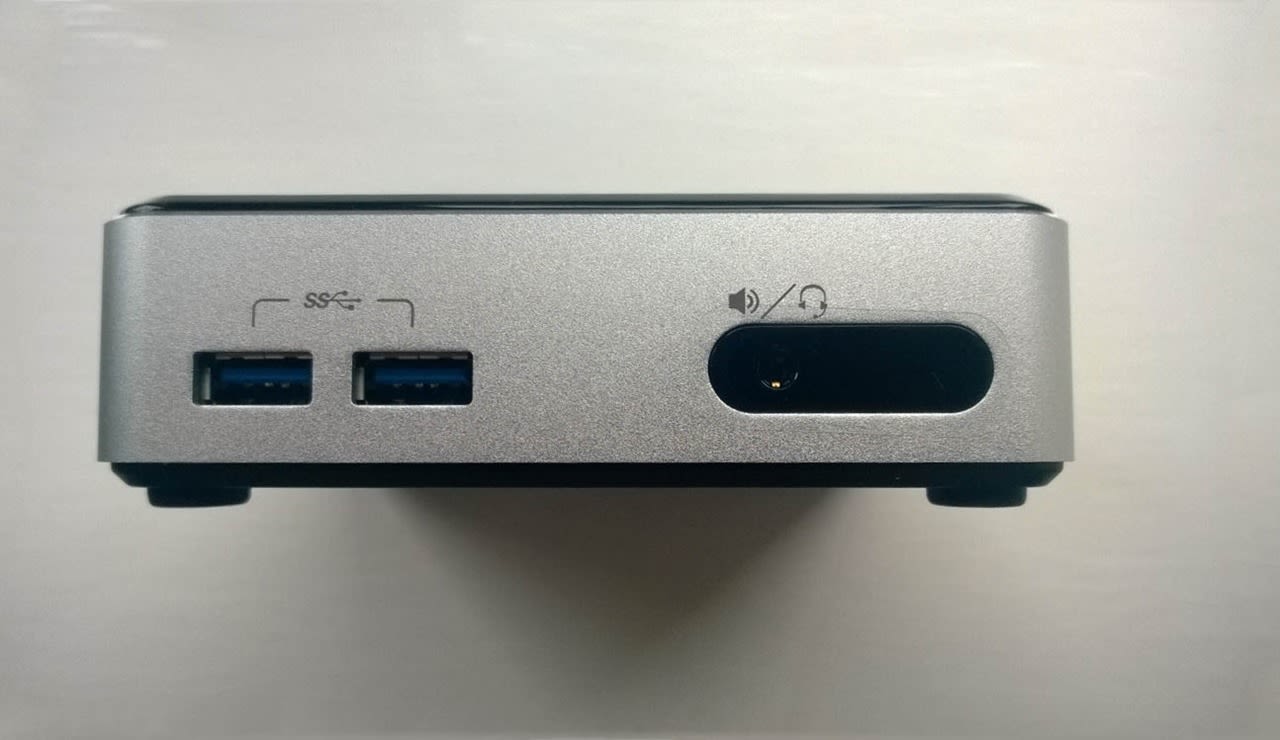
The Intel® NUC Kit D54250WYK is barebones, so you will also need to buy your own memory, Wi-Fi card and SSD. Opening up the device is very straight forward, just unscrew the four screws in the rubber feet on the bottom of the device. One word of advice, don't remove the plastic protector from the top of the machine, as it protects the fingerprint magnet, glossy black plastic top of the device, from getting scratched, which seems to happen all too easily.

Fitting the memory is very simple. One note of warning, the Intel® NUC Kit D54250WYK uses the Haswell architecture, which means the device is low power and requires 1.35V SO-DIMM 1600/1333 MHz DDR-3 memory. 1.35V not the more common 1.5V memory. If you accidentally buy the 1.5V RAM you will experience the blue BIOS blink codes representing memory errors. We settled for 16GB of RAM.
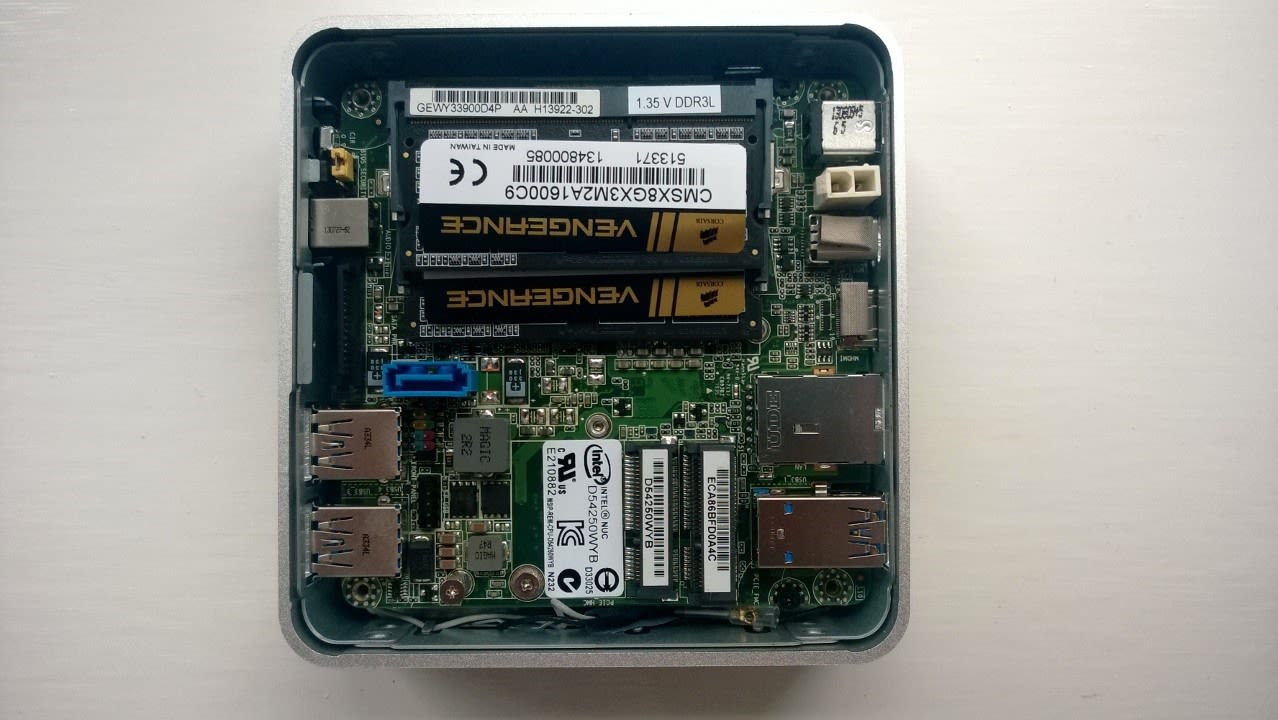
We settled on a Intel® Centrino® Advanced-N 6235 Intel Dual Band Wireless-AC 7260 mini PCI Express card for Wi-Fi and Bluetooth (which we found to be much more reliable than the Intel Centrino Advanced N 6235, which has various problems reported about Intel Wi-Fi cards randomly dropping connections). In the photo below you can see it installed in the lower slot, note the antennas plugged into the card. You need to unscrew the screw located in the bottom right corner, as this is used to secure the card once it has been inserted into the port.

Next, we purchased a Crucial CT256M550SSD3 256GB SSD (Update - originally this was a 128 SSD)– I was surprised when the device was delivered, because it's so utterly tiny! The photo below shows the SSD next to a USB mini dongle:

To install the SSD, you first need to undo the mounting screw that is used to hold the card in place, once it has been slotted in, it also provides support to ensure there is a gap between the Wi-Fi card and the SSD. The whole process of fitting the required components took less than 10 minutes.
!](/assets/images/blog/2014/01/WP_20140103_004.jpg "WP_20140103_004")
Once the components have been fitted, screw the base back on, plug in the power adapter and turn the device on. If there are any issues with the hardware components, use the BIOS blink codes to determine the source of the problem.
The Wireless Keyboard + Mouse
As we planned to place the NUC inside our meeting table (it has internal shelves for storing power cables), I wanted a wireless keyboard and mouse to drive the device. I've been in many meeting rooms that have a wireless keyboard and mouse combo, and generally the mouse is either missing, the batteries have run out, or it's cheap and painful to use. After doing a bit of research about wireless keyboard for media centres / controlling smart TVs, I stumbled across a review for the Logitech TK820 Wireless All-in-One Keyboard, which not only looks lovely, but has pretty good reviews. The built in touchpad is massive (more akin to an Apple Magic Touchpad than a standard postage stamp size PC touchpad). You can see from the photo below that the touchpad is the same size as the NUC! The touchpad has support for Windows 8 multi-touch gestures (swipe, pinch, scrolling, etc..) and works well with Windows 8.1.
The keyboard is a bit pricey – but having used it for the last few days, I can say it's worth every penny.

The Projector
Projector technology has come on leaps and bounds because of the home cinema revolution. My last experience of having to use a projector in a team environment, involved hours lost trying to get it to pick up your laptop's VGA port as a valid source, then having to try and demo some code, or manage some user stories in a 800 x 600 resolution desktop. Thankfully those days are long gone; you can get a full 1080p (1920 x 1080) projector with a HDMI connector, that doesn't sound like a harrier jump jet doing a vertical take off, for less than £700.
The Epson EH-TW5200 has the best balance of features for price and good user reviews of all the projectors I could find. My only quibble with the device is, that yet again, the product designers have gone for fingerprint magnet, glossy black plastic. The photo below shows the projector from above, with the standard configuration of easy access buttons. Because we connect to the projector via HDMI it automatically selects the correct source. I've only made one manual adjustment to the default settings – to turn the projector onto ECO mode, which reduced the bulb intensity, makes the device run cooler and reduces the fan noise.

The rear of the projector shows connectors galore! Two HDMI ports – which are especially useful as one is constantly connected to the NUC, while the 2nd is free to connect to a laptop if a 3rd party wants to do a presentation, standard VGA etc.. and the internal speaker, which is surprisingly good, although, using the audio out port, we could easily connect the projector to our Sonos Play 5 for much better sound.

There's not much to see from the front view, just the lens (and the in built lens cover), the air vent and an adjustable leg:

The projector is great, the resolution of the screen connected to the NUC is glorious, the colours are vibrant and the refresh rate is snappy, meaning that you can play full HD videos on the NUC and they look fantastic.
The Conference Cam
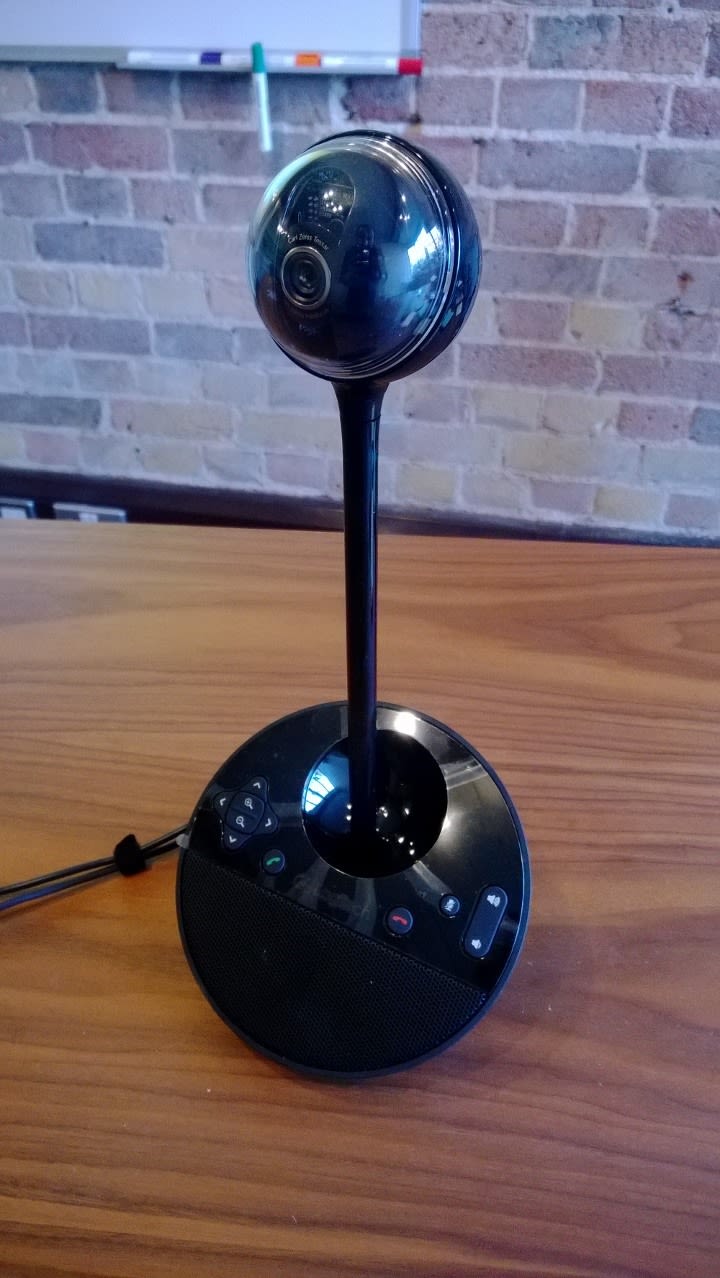
The final item of kit is a HD conference cam. Every Endjineer gets a Plantronics Blackwire C420-M/Z Binaural Headset as standard issue, but if you're having a big group conference call, it can get quite distracting hearing two versions of the same sentence, one with substantial lag, so I went on the hunt for a decent conference camera & speaker phone. The Logitech BCC950 ConferenceCam is the perfect device; it supports HD video, has a great in built speaker and supports echo reduction to make the call as clear as possible. It has answer and hang up buttons (which you need to install a separate plugin to integrate with Skype), which make it really easy to use the device. If you want to to allow external parties to call directly to the device, create a new Skype account for the NUC and purchase a Skype Number (for about €5 per month), which will give you an external telephone number that will be routed to that specific Skype account.
The ConferenceCam is also motorised for panning and zooming and comes with a remote. Scott Hanselman has a great post on how you can programmatically control the device via Windows Azure Service Bus, to make the device a conduit for remote workers.
The Final Bill
We're really happy with the set up, it's made meetings and conference calls dramatically better. Everyone has been surprised at how small and powerful the Intel NUC is, and a few of us are now considering purchasing one for home – as the device also comes with a VESA mount which allows you to mount the NUC on the rear of your television, if you wanted a new media centre set up, or on the rear of your monitor if you want a clutter free desk, or space is a premium in your household.
Below is the parts & price list for the components mentioned above as of Jan 2014. You have to order the whiteboard from Pitts Presentation, the rest of the components can be purchased from Amazon.
| Item | Price (ex VAT) |
|---|---|
| Magnetic Whiteboard. Size: 2400mm x 1200mm | £193.00 |
| Intel NUC D54250WYK Intel Core i5 Haswell Barebones Micro PC | £258.29 |
| Crucial CT256M550SSD3 256GB M550 mSATA Internal SSD | £94.60 |
| Crucial 16GB (2x 8GB) DDR3 1600 MT/s SODIMM 204 Pin 1.35V/1.5V | £91.95 |
| Intel Dual Band Wireless-AC 7260 - Network adapter - PCI Express Half Mini Card | £16.90 |
| Logitech TK820 Wireless All-in-One Keyboard | £74.99 |
| Logitech BCC950 ConferenceCam | £136.47 |
| Epson EH-TW5200 Full HD 1080p 3LCD 3D Projector | £624.99 |
| Total: | £1,491.19 |
I wanted to give a special thanks to Joe Feser, for the twitter conversation about his NUC setup and helping me realise that I had ordered memory with the wrong voltage!


